88 - Boot Avira Rescue from USB
RMPrepUSB Blog - please leave a comment or feedback on RMPrepUSB or this Tutorial (please mention Tutorial number).
The Avira Antivir Rescue System ISO file can be downloaded from the Avira site here.

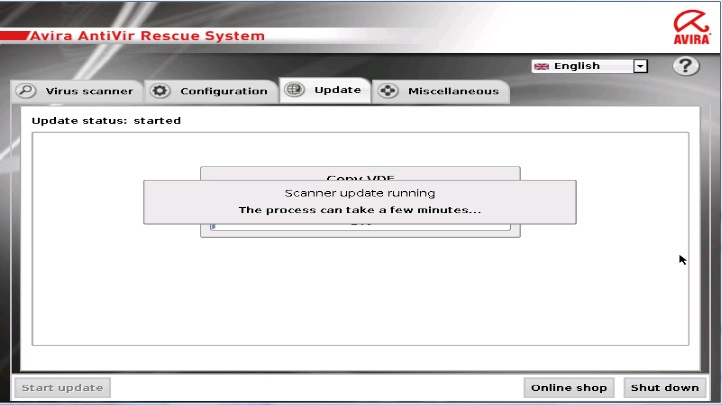
Avira Rescue in action!
Note: Avira Rescue System can be booted directly from a single ISO by using Easy2Boot. Just make an Easy2Boot multiboot USB drive and copy the ISO file over to the Easy2Boot USB drive and then run WinContig to defrag the file.
The instructions below are for an older version of Avira, see here for the grub4dos menu that is required for later versions.
Avira can be booted as a flat file system by extracting files (2 files and 3 folders) from the ISO, or by booting directly from the .ISO file. However, you also need to extract some folders from the .ISO file even if directly booting from the ISO file - the folders in red below must exist as normal lowercase files and folders on the USB drive - the other files and folders are not required for ISO booting:
ISO contents: (only the three folders in red are required on the USB drive)
==========
<DIR> antivir
29,926 avira.ico
<DIR> avupdate
2,048 boot.cat
<DIR> html
202 index.html
35,894,627 initrd.gz
10,588 isolinux.bin
556 isolinux.cfg
1,062 license.txt
<DIR> licenses
<DIR> system
8,361,984 vmlinuz
741 welcome.msg
<DIR> [BOOT]
1. If you don't already have a grub4dos bootable USB drive, prepare one using RMPrepUSB. Format as FAT32 + Boot as HDD, and then install grub4dos and copy over the grldr file when prompted by pressing the <Enter> key.
2. Use 7Zip or a similar utility to extract the antivir, avupdate and system folders from the ISO file to the USB drive - make sure that these folders are lower-case. Do not use ImDisk to mount the ISO and copy over the files as this does not preserve the case of the files. The files should be lower-case.
3. Copy the whole Avira iso file to the USB drive.
Note: If you wish to save space, you do not really need the ISO file at all, just create a new folder called \avira and extract the two files initrd.gz and vmlinuz from the ISO file and copy them into the \avira folder on the USB drive and then use the alternate menu in the Notes section at the bottom of this page.
4. Add the following entries to the menu.lst file if you have the ISO file present (press F4 in RMPrepUSB to load the file into Notepad).
title Avira ISO\nAvira Antivir Rescue System
map /rescue_system-common-en.iso (0xff) || map --mem /rescue_system-common-en.iso (0xff)
map --hook
root (0xff)
kernel /vmlinuz nofb ramdisk_size=107023 root=/dev/ram0 rw console=/dev/vc/4
initrd /initrd.gz
title Avira ISO - ask VGA mode\nAvira Antivir Rescue System
map /rescue_system-common-en.iso (0xff) || map --mem /rescue_system-common-en.iso (0xff)
map --hook
root (0xff)
kernel /vmlinuz vga=ask ramdisk_size=107023 root=/dev/ram0 rw console=/dev/vc/4
initrd /initrd.gz
4. Ensure the files and folders below are present on your bootable USB drive. If you wish, you can move the ISO file to a folder as long as you change the path in the menu.lst entries to match.
267,531 grldr
574 menu.lst
266,776,576 rescue_system-common-en.iso
<DIR> antivir
<DIR> avupdate
<DIR> system
5. You can now test the USB drive using the RMPrepUSB QEMU button (or press F11) or try it on a real system. If the ISO file loads entirely into memory, then the ISO file is not contiguous - try CTRL+F2 in RMPrepUSB to run WinContig and make the ISO contiguous. If that doesn't work then copy all files off of the USB drive, reformat it and then copy all the files back.
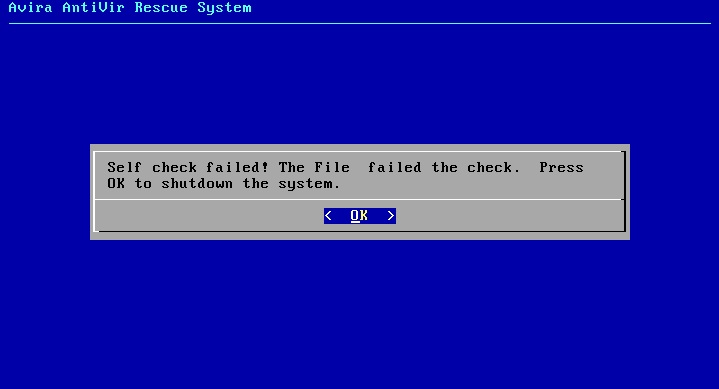
Note: If you try to fully boot under QEMU then you may get a Self Check Failed error - you may need to use map --mem in order to correctly run Avira Rescue under QEMU. Be sure to assign QEMU about 900MB of memory (but don't go over 1.1GB as QEMU does not seem to handle large amounts of memory well!).
Troubleshooting

1. Press Alt+F7 to return to the graphical User Interface - this error message occurs if it cannot find some of the files and folders on the USB boot drive. Make sure that you have extracted these from .ISO file correctly and that they are lower-case and not upper-case. If you used ImDisk to mount the ISO and then copy the files to the USB drive, then the files will be converted to upper-case and you will get this error (the GUI will fail to launch). Use 7Zip to extract the required folders from the ISO.

2. Self Check Failed - this error message occurs if you have not copied the contents of the ISO to the USB drive as a flat file/folder structure. In particular, you will see this error if the \system folder is not present on the USB boot drive.
Notes
You could also boot Avira from a pure flat file structure - the ISO file would then not be needed. For this you will also need to extract the initrd.gz and vmlinuz files from the iso file. These two files can be moved to another folder on the USB boot drive, e.g. make a new \avira folder on the USB drive and place these two files in it.
The menu.lst entries should be as follows:
title Avira\nAvira Antivir Rescue System
kernel /avira/vmlinuz nofb ramdisk_size=107023 root=/dev/ram0 rw console=/dev/vc/4
initrd /avira/initrd.gz
title Avira - ask VGA mode\nAvira Antivir Rescue System
kernel /avira/vmlinuz vga=ask ramdisk_size=107023 root=/dev/ram0 rw console=/dev/vc/4
initrd /avira/initrd.gz
2016 ISO
You can extract the ISO to any folder, but the .disk folder must be present in the root of the USB drive. use:
kernel /myavira/casper/vmlinuz file=/cdrom/preseed/ubuntu.seed boot=casper live-media-path=/myavira/casper quiet splash --
If you get a 'Welcome to Ubuntu' text prompt, then it has worked but it did not like your system. Try the nomodeset cheat code or use a real system (not a VM).
If you get a 'looking for Index files'... fail and 'provide a name' prompt, it is because it cannot find a \.disk\info file.

