
Raspberry Pi v1 and v2 + Motorola Atrix 4G lapdock

I have only just discovered that the Motorola Atrix 4G lapdock can be used with the Raspberry pi Model B to make a perfect notebook! There are videos on YouTube about it. Here is my setup:
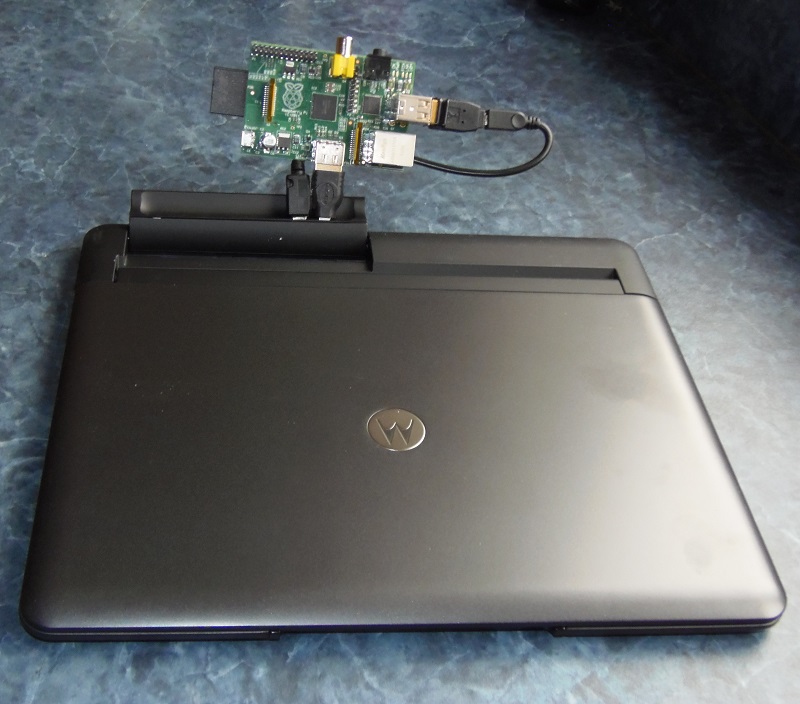
WiFi Raspberry Pi netbook
The Atrix 4G lapdock was produced so you could simply dock your Atrix 4G smartphone with it and have a notebook. However, the Atrix 4G phone is now discontinued and so the price of the lapdock has gone down from £300 to £75 (checkout eBay but hurry as they are selling like hotcakes and the price keeps going up!)
Even if you cannot justify the expense for your pi, the lapdock provides a cheap and portable HDMI display which would be useful for hooking up to anything which has an HDMI output (e.g. play movies on your phone in the car but watch on the lapdock's larger screen, or use it as a second PC monitor).
This is what the lapdock provides for the pi and all for £75!
Power Input socket
Screen 1366x768 11.5"
Keyboard (you can get a QWERTY UK version - check before you buy!)
Touchpad
2 extra USB ports
HDMI video
HDMI audio + speakers
Battery to power it all
AC Adapter to charge the lapdock battery + power it
Power to the pi is switched on when you connect an HDMI cable.
Open the lapdock lid to turn on power to the lapdock screen and the USB ports.
The lapdock has two main connections to the pi
1. micro-USB MALE connector (provides power + keyboard + touchpad connectivity) - connect this to one of the two pi USB Type-A ports
2. mini-HDMI MALE connector (provides video + audio connectivity) - connect this to the pi HDMI port
For connections (cables) see here. You do NOT need to cut and solder a special cable! Note that if your pi has fuses F1 and F2 fitted, then just solder a wire across the top of each one to short each fuse out (later pi boards already have this fix and don't have F1 and F2) - then cover the two wires with a bit of tape just to prevent accidental shorts if the wire was not insulated. You could use mains fuse wire for this or any spare bit of insulated wire from an old plug lead. This modification is standard in later models of the pi where F1 and F2 are not fitted, so you are not making your pi non-standard by doing this, you are simply upgrading it with this modification!
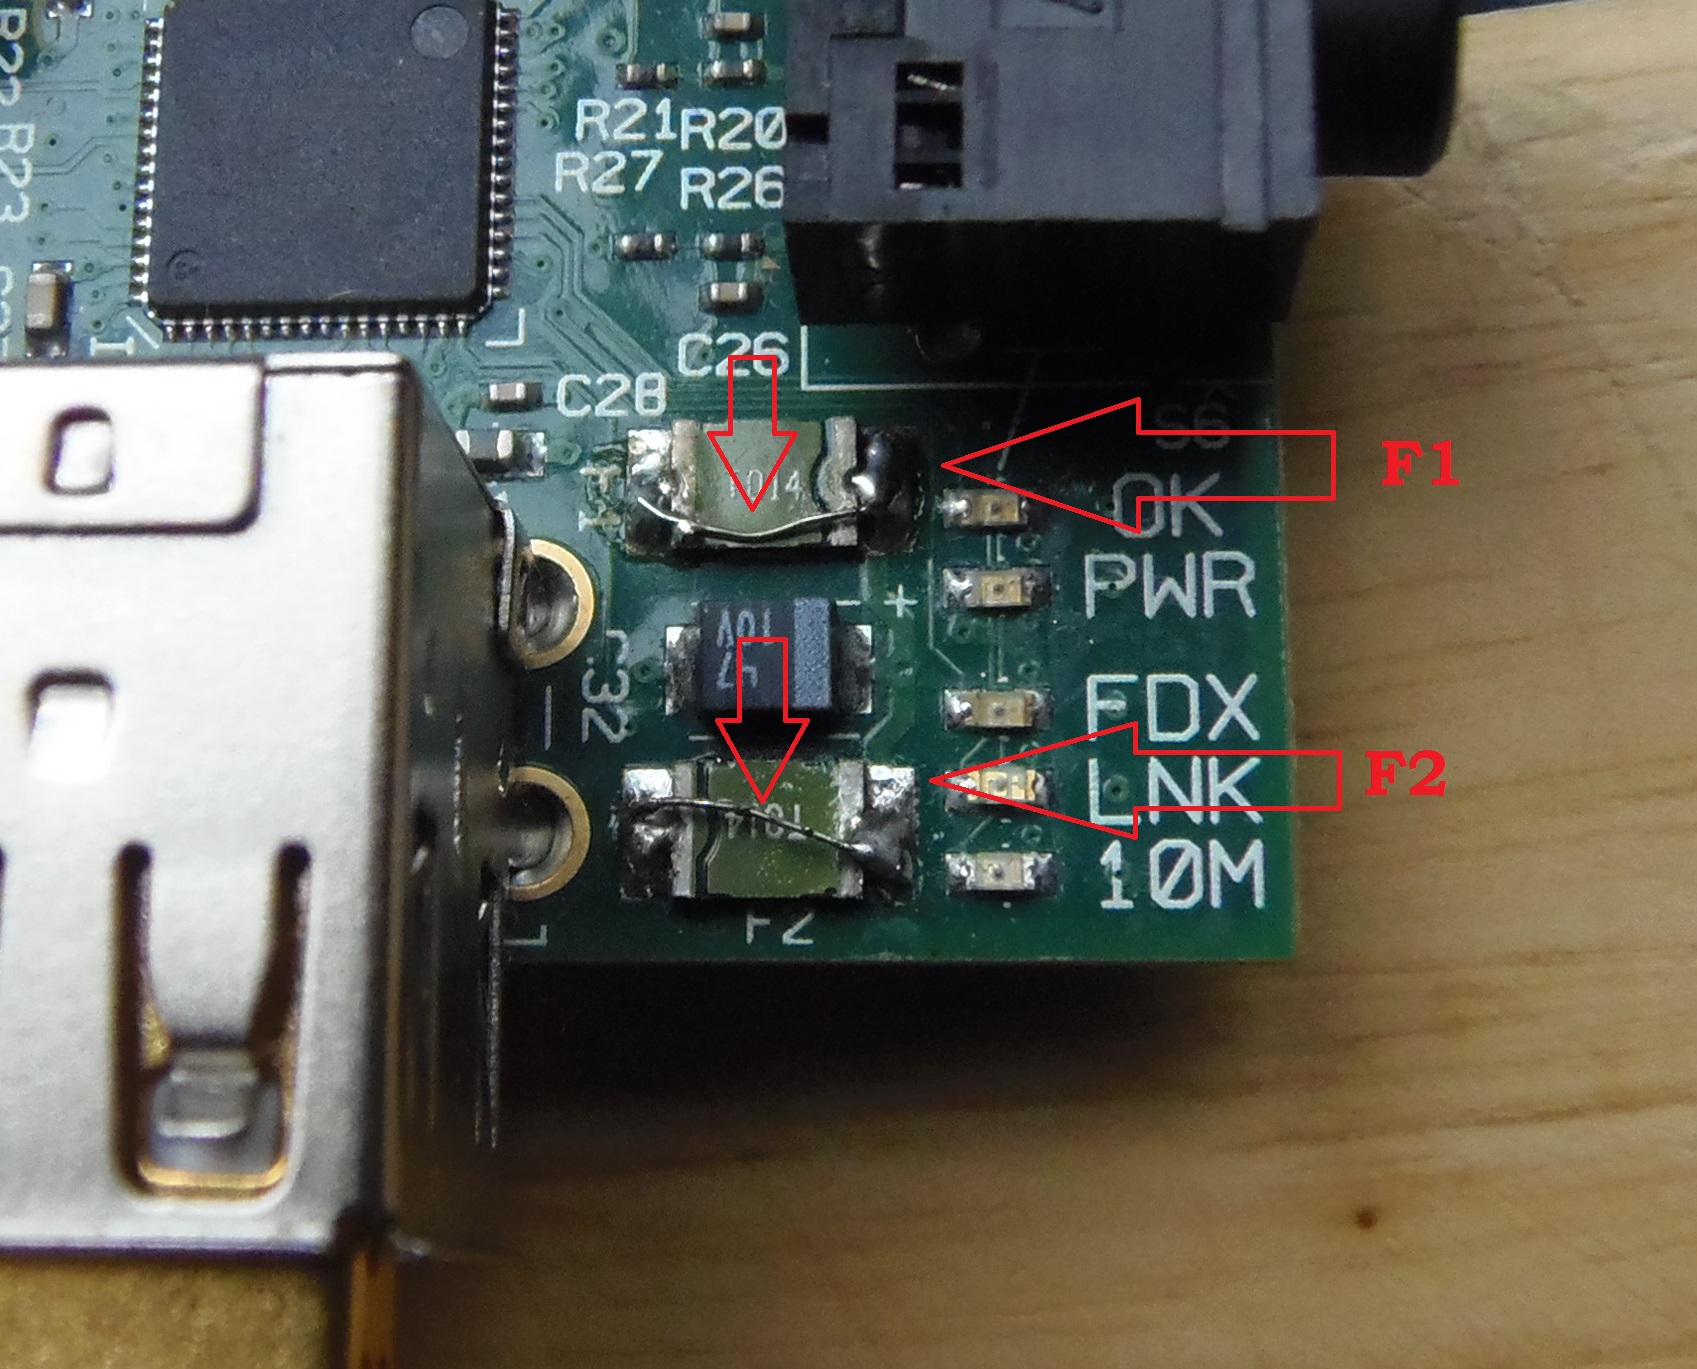
Modified Pi to get power via USB sockets (click to enlarge)
Tip: To shave off some plastic from the connectors so that they will fit, use a potato peeler - this stops you from accidentally cutting too deeply and also is much safer to use than a sharp knife!
Before plugging in the pi, open the lid on the lapdock - this powers the lapdock USB ports and so debian will detect anything connected to the lapdock USB ports as it boots up. If you open the lid after the pi boots up, it won't detect the peripherals that you have connected to the lapdock USB ports.
Sound through HDMI (Debian Squeeze)
Once your logged into Debian Squeeze, you will need to edit config.txt and set hdmi_drive=2 as follows:
Enter command sudo nano /boot/config.txt
Enter hdmi_drive=2
Press Control-x
Press y
Press [enter] key
Type: sudo modprobe snd_bcm2835
For 1366x768 add disable_overscan=1
You can also edit the file using Windows/Mac:
# Force the monitor to HDMI mode so that sound will be sent over HDMI cable
hdmi_drive=2
# Set monitor mode to DMT
hdmi_group=2
Americanise the keyboard
Log in as root.
Run 'dpkg-reconfigure locales' and change from en_GB.UTF-8 to en_US.UTF-8
Run 'dpkg-reconfigure keyboard-configuration' and change the keyboard to USA PC104
Reboot
More Info on Power on and HDMI detection
From here
'So here's the deal: all HDMI grounds are shorted to the HDMI shell except the DDC/CEC ground which is connected to JHDMI pin 3. If nothing is plugged into the Lapdock Micro HDMI port, Lapdock pulls DDC/CEC ground to +10V. Then when you plug an Atrix into Lapdock, Atrix shorts DDC/CEC ground to the other grounds, and Lapdock detects that Atrix is present and brings up the +5V charging voltage on the Micro USB connector. If Lapdock is open, it also turns on the two USB A ports and turns on the display, keyboard, and trackpad.'
If you have connected the HDMI cable and you don't get power, it probably means your HDMI cable is incorrectly wired (some are!) for the DDC/CEC signal.
Disassembling the lapdock
Remove the small strip at the back of the Lapdock which is fixed by three small screws (two under pry-off rubber feet) and some plastic tabs which unhook. Tip: To avoid damage, a thick plastic guitar plectrum makes a perfect tool to pry off the case with (also useful for mobile phone cases too!).
Raspberry Pi 2 B
The Pi 2 does not seem to power up if using just the USB ports (not the uUSB power connector) to power it.
This meant that my Pi v1 cable setup did not work with my Pi 2!
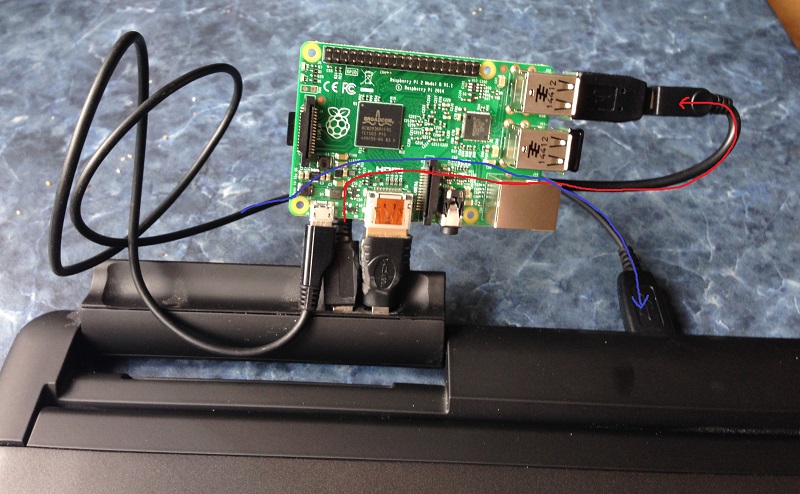
In the end, I simply re-arranged the cables as follows
Lapdock uUSB dock port > Pi 2 USB (any one of the 4)
Lapdock USB rear port > Pi 2 uUSB power conector
Lapdock uHDMI > Pi 2 HDMI using an adaptor
I also added a WiFi dongle to one of the Pi 2 USB ports.
If I open the lid, it powers on the Pi 2 and boots up.
If I close the lid it powers off the Pi 2.
Keyboard, video, audio, USB and touchpad all work fine.
The whole setup is portable just like a laptop.