
85 - Add the O&O DiskImage Professional ISO to your USB multiboot drive

If you have a licensed ISO of O&O DIskimage 6 Professional, you can add this to your multiboot USB drive as follows:
Requirements
1. A working bootable USB drive which has grub4dos already installed (complete with a menu.lst file)
2. An O&O DiskImage Professional ISO file which is legally licensed and working - e.g. OODI_6.8.1_PRO_ENU.ISO
Method
1. Mount the ISO file using ImDisk or Virtual CloneDrive and copy the OOLIC folder to your target grub4dos multiboot USB drive.
2. Unmount the ISO and then copy the entire ISO file, e.g. OODI_6.8.1_PRO_ENU.ISO to the USB drive (it can be placed in any folder, but I use the \_ISO folder for my USB drive)
3. Using Windows Explorer - Properties dialogue (right-click on the USB drive icon), change the volume label of the USB drive to OODIPRO
4. Add the following menu entry to your menu.lst file (use RMPrepUSB F4 or just Notepad):
The USB drive should now look like this:
You should now be able to test your bootable USb drive successfully. The OOREGMAN.CFG file must be located in the \OOLIC folder at the root.
If your multiboot drive needs to have a different volume label, then see Tutorial 86 which shows you how you can dynamically change the volume label in your menus.
Copy Protection (avoiding the need to change the volume label on your multiboot drive)
If anyone gets hold of your USB drive, they can simply copy it and get a fully licensed working copy of DiskImage Pro.
To safeguard your licence, here is what you can do:
1. Use another (spare) USB flash drive of any capacity - this will be your 'key' drive
2. Change the volume name of this key drive to OODIPRO using Windows Explorer - Properties
3. Copy the OOLIC folder onto this new key USB drive
4. Delete the OOLIC folder from your multiboot USB drive
The USB multiboot drive can now have any volume name. The 'key' drive must have the volume name of OODIPRO and must contain the OOLIC\OOREGMAN.CFG file.
Now when you want to boot your multiboot drive and run DiskImage Pro, you must also insert the 'key' USB drive which has the OODIPRO volume label and which contains the licence file.
This 'key' USB flash drive can be inserted at any time as long as it is before you click on the OK button - i.e. it can be inserted into a USB slot just after you accept the DiskImage Pro EULA but before you start an action on a drive by clicking the OK button - see the screenshot below:
Note: if you do not change the volume label to OODIPRO then when you click on the button OK button after selecting the Target System, you will get the following message 'The action cannot be carried out without a license.' If for some reason you cannot or do not want to rename the USB drive volume label, see the section below.
title RUN O&O Diskimage 6.8 build 1 Pro\nThis will run O&O DiskImage 6.8 build 1 Bootable CD
map /_ISO/OODI_6.8.1_PRO_ENU.ISO (0xff)
map (hd0) (hd1)
map (hd1) (hd0)
map --hook
chainloader (0xff)/BOOTMGR || chainloader (0xff)
Volume Name: OODIPRO
OODI_6.8.1_PRO_ENU.ISO
grldr
\OOLIC\OOREGMAN.CFG
menu.lst
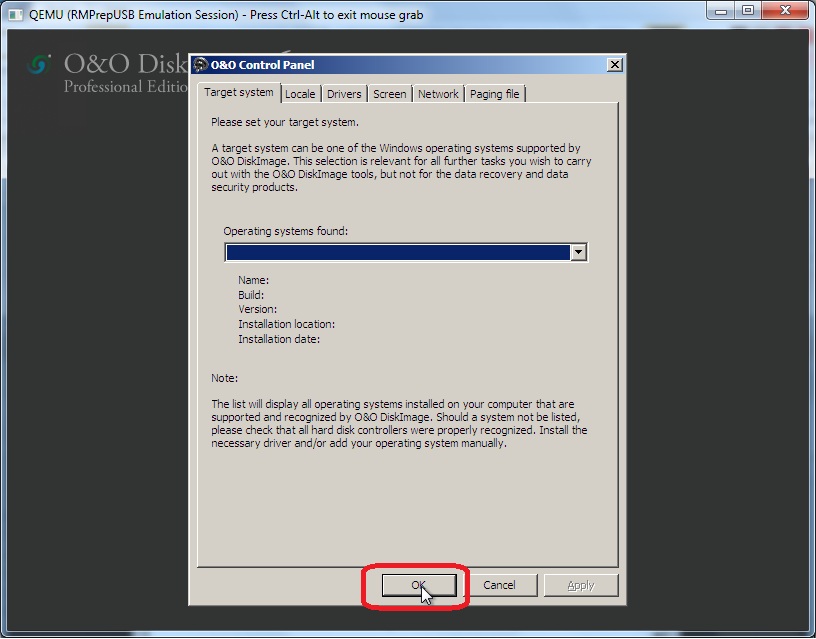
Ensure you insert the USB 'key' drive before you click on 'OK'
Multiple versions
If you have v6 and v7 and want both on the same USB drive:
Make two new files in the OOLIC folder, one for each of the CFG files - e,g,
\OOLIC\OOREGMAN6.CFG is 580 bytes.
\OOLIC\OOREGMAN7.CFG is 399 bytes.
Copy the largest file to /OOLIC/OOREGMAN.CFG
Then add a line to each menu which will overwrite the OOREGMAN.CFG file as follows:
dd if=(bd)/OOLIC/OOREGMAN6.CFG of=(bd)/OOLIC/OOREGMAN.CFG
or
dd if=(bd)/OOLIC/OOREGMAN7.CFG of=(bd)/OOLIC/OOREGMAN.CFG