134 - Configure Windows to boot to grub4dos using the BCD
This Tutorial below refers to MBR\Legacy Windows booting only, not UEFI-booting.
It allows us to boot to any payload (e.g. linux ISOs) directly from the Windows Boot Manager menu.
Introduction
The usual way to boot to grub4dos from Windows, is to configure Windows to boot to grldr.mbr which then runs glrdr which then loads a grub4dos menu (menu.lst). You can also directly boot to the grldr file.
The grldr.mbr file can be obtained from inside the grub4dos download zip file and comprises of the MBR boot sector and the Stage 1.5 boot code - it will look for the /grldr file and then run it.
The grldr file contains an embedded pre-boot menu.lst in the last 512 bytes of the file. This is normally used to look for the users menu.lst file which should be on a drive somewhere.
Here is the standard embedded config file inside grldr 0.4.6a and which tries to find and run a menu.lst
pxe detect
configfile
default 0
timeout 1
title find /menu.lst, /boot/grub/menu.lst, /grub/menu.lst
errorcheck off
configfile /boot/grub/menu.lst
configfile /grub/menu.lst
if "%@root%"=="(ud)" && calc *0x82A0=*0x82b9&0xff
if "%@root:~1,1%"=="f" && find --set-root --devices=f /menu.lst && configfile /menu.lst
find --set-root --ignore-floppies --ignore-cd /menu.lst && configfile /menu.lst
find --set-root --ignore-floppies --ignore-cd /boot/grub/menu.lst && configfile /boot/grub/menu.lst
find --set-root --ignore-floppies --ignore-cd /grub/menu.lst && configfile /grub/menu.lst
configfile http://b.chenall.net/menu.lst
errorcheck on
commandline
title commandline
commandline
title reboot
reboot
title halt
halt
However, we can instead, boot directly to the grldr file from bootmgr by configuring the Windows BCD file.
Also, we can edit the embedded menu inside the grldr file to boot to any payload directly, so we do not have to load a grub4dos menu first.
This means we can have a Windows bootmgr menu with multiple entries which point to different grldr files and instantly run any payload we like.
Method
For instance, suppose we want to add memtest to our Windows bootmgr menu
1. Download Pauly's BootIce (if you prefer, you can try the Visual BCD Editor)
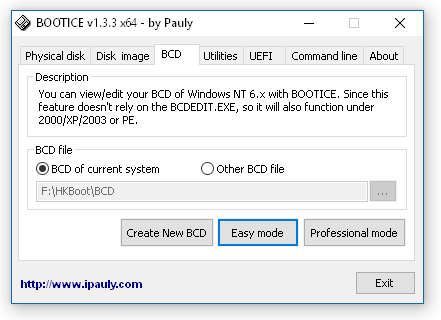
2. Edit the \Boot\BCD file by choosing the BCD tab. You can choose to edit the current system BCD, or edit a BCD file on a different volume (for instance on a Windows-bootable USB drive)
3. Use the Add button to add a new RealMode entry
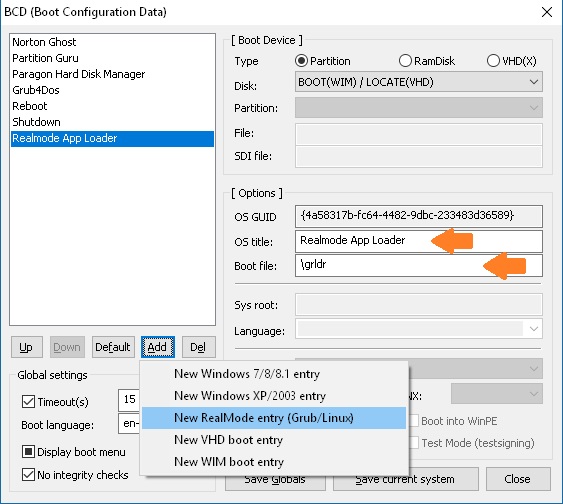
Note: A solid black checkbox indicates 'not defined in BCD'.
4. Edit the OS title (the text that will appear in the Windows menu)
5. Specify the name of the Boot File - for instance, \memtest.bin
6. Click on the Save current system button and then Close
7. Make a copy of the grldr file and rename it to memtest.bin - place it in the root of the volume that contains the BCD and bootmgr files.
8. Now select the Utilities tab in BootIce and click on the Start Menu Editor button
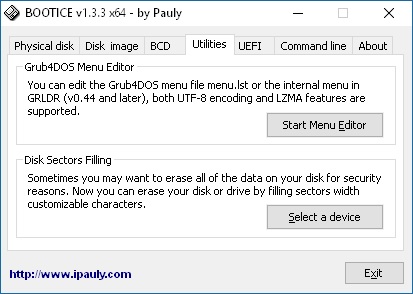
9. Use the yellow folder icon to select the memtest.bin file - you can now change the default embedded menu to directly run memtest, e.g.
find --set-root /Memtest.gz
map --mem /Memtest.gz (fd0)
map --hook
chainloader (fd0)+1
rootnoverify (fd0)
boot
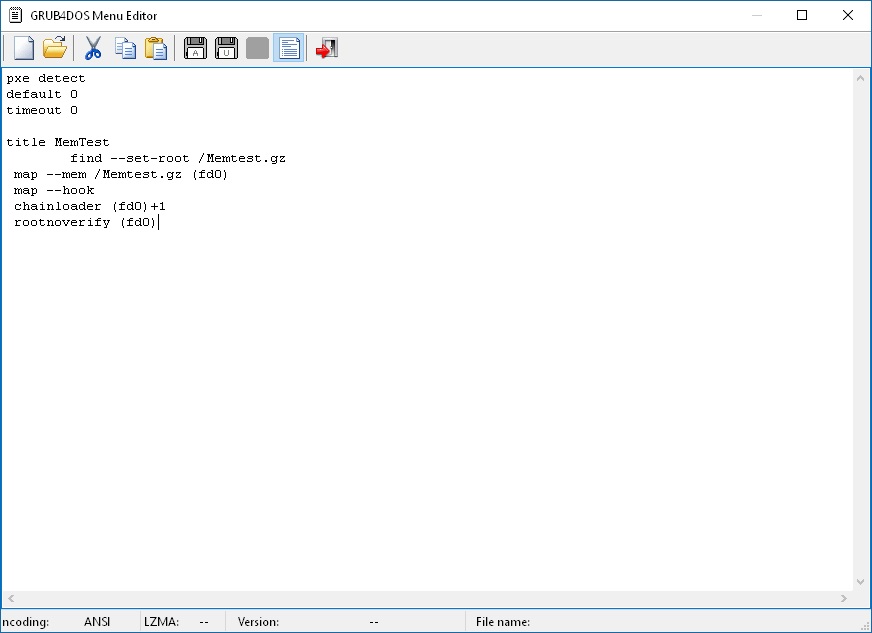
10. Click on one of the Floppy Disk icons (for English ANSI characters use the A icon, for languages that require UTF-8 characters use the U icon, if you menu is larger than 512 bytes, use the UZ icon). Exit BootIce.
Note: If the menu is quite large (>512 bytes) I suggest you reload it again and check that all characters were saved correctly.
11. Now copy the Memtest.gz payload to the root of a volume so the grub4dos can find it and load it.
You should now find you can directly boot to MemTest from the bootmgr Windows menu.
You can repeat this process to boot to any payload that is bootable via grub4dos.
The advantage of having lots of different grldr files, is that you can have all your different menu options in the Windows bootmgr menu and you do not have to load a grub4dos menu first.
One possibility is that you could add a menu entry to run Clonezilla and automatically backup or restore the Windows partition.
To boot to a linux ISO, we can embed the appropriate grub4dos commands, e.g.:
If the ISO file ubuntu-11.04-desktop-i386.iso is in the root of a partition on any drive in the system...
find --set-root /ubuntu-11.04-desktop-i386.iso
map /ubuntu-11.04-desktop-i386.iso (0xff) || map --mem /ubuntu-11.04-desktop-i386.iso (0xff)
map --hook
root (0xff)
set k=vmlinuz
if exist /casper/vmlinuz.efi set k=vmlinuz.efi
kernel /casper/%k% file=/cdrom/preseed/ubuntu.seed noprompt boot=casper persistent iso-scan/filename=/ubuntu-11.04-desktop-i386.iso quiet splash --
initrd /casper/initrd.lz
boot
If you want a persistent filesystem to keep all your changes, make a new ext3 /casper-rw file (volume name and file name must be casper-rw) using the Create Ext2/3/4 FS button in RMPrepUSB (size of 1 to 4 GB recommended if you have space).
Adding Tools menu and changing the menu order
You can define the order in which the menu items are listed.
You can have a Main Menu and a Tools Menu, the user can use the TAB key to move between the two menus...
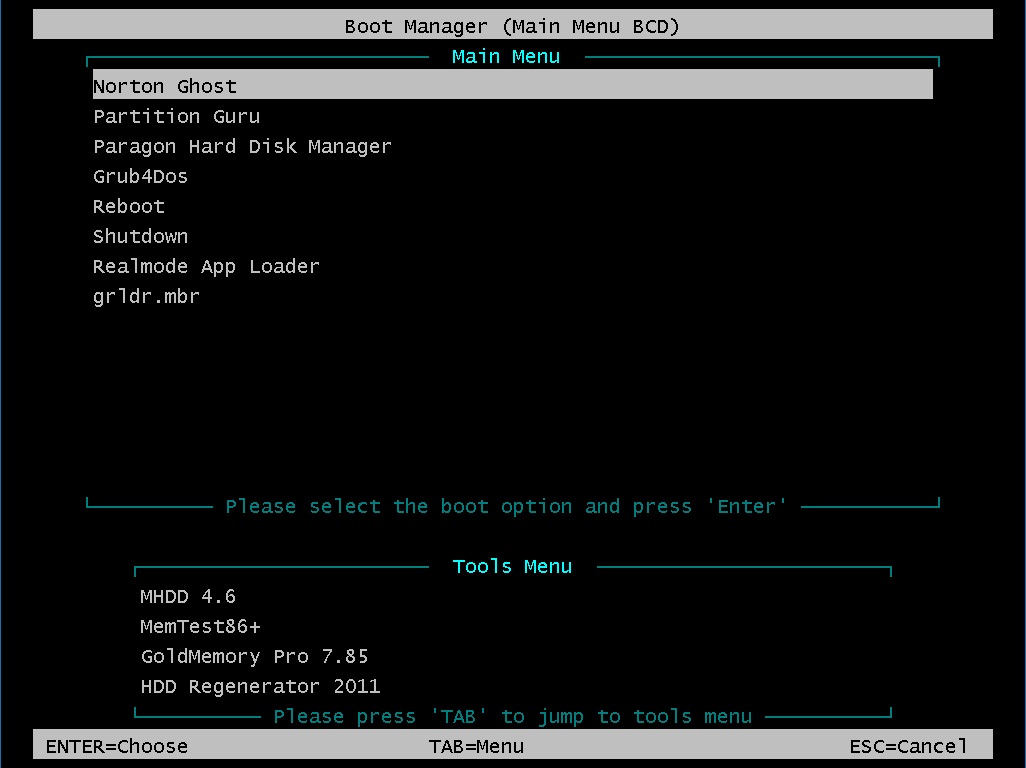
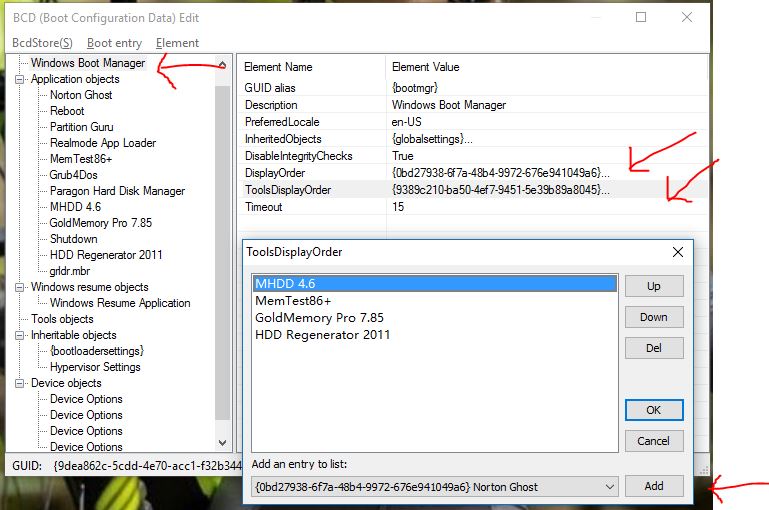
Use BootIce - BCD - Professional mode
Select the top Windows Boot Manager entry and then double-click on either the Display Order or Tools Display Order.
Use the controls to add/delete/re-order the menu items.
