
Table of Contents
INTRODUCTION
Using WinImage you can create and edit a bootable floppy disk image. Floppy disk image files usually have the extension .ima or .img and are byte-for-byte copies of all sectors of the entire floppy disk. These floppy disk image files are useful for using with grub4dos and are also used in many of the tutorials on this website. I thought I would just make a few notes here on how to use WinImage to create and edit floppy image (.ima) files. You don’t need to use WinImage at all to create or edit bootable floppy disk images though – see sections 2-4 for more details.
Note: MSDOS is a licensed product and you should not distribute it or even use it if you do not have a Windows/DOS licence. FreeDos is freeware and has an ‘Open’ licence, you can freely use and distribute FreeDos.
Please note: WinImage is shareware. You may evaluate it for a trial period of 30 days. After 30 days, if you wish to continue using WinImage, you need to register.
The first step is get a bootable floppy disk image. For an MS-DOS floppy disk boot image, you can simply use the RMPrepUSB – File – Create MS-DOS 1.44MB Floppy Boot Image option.
OR you can either use one of the ima images from the Beta downloads section (for instance PCIID.ima.gz has a compressed FreeDos bootable 1.44MiB floppy disk image – see here for FreeDos image downloads) or obtain a bootable floppy disk image from www.bootdisk.com perhaps. You can also create your own images – see sections 2-4 below.
– OR –
you can create a floppy disk image from a real floppy disk if you already have one (or any 1.44MiB flash pen which appears as drive A: in Windows Explorer).
See Section 3 below if you want to create a 2.88MB blank floppy disk image.
CREATE AND EDIT A 1.44MB OR 2.88MB DOS FLOPPY DISK IMAGE
1. Download and install ImDisk (from http://www.ltr-data.se)
2. Download and extract one of the BLANK floppy disk images – either BLANK_FLOPPY144.IMA (1.44MB MS-DOS formatted blank) or BLANK_FLOPPY_288.IMA (2.88MB MS-DOS formatted blank). Note: These blank images contain the MS-DOS boot loader and so will look for IO.SYS.
3. Right-click on the downloaded .IMA image file and select ‘Mount as ImDisk Virtual Disk Drive‘ – set the drive letter to A: (it does not matter if you already have a drive A:). – click OK to mount the image as drive A:
4. You can now copy files to your new drive A: as if it was a real drive. Make sure you change Windows Explorer to show ALL files including hidden and system files or you won’t copy over essential boot files! If it is a 1.44MB image, you can even use Windows to format it as an MS-DOS startup disk.
5. When you have finished editing the files on drive A: – unmount the image by right-clicking on the A: drive in Windows Explorer and choosing ‘Unmount ImDisk Virtual Disk‘
6. (optional) To remove all old deleted files and reduce the image size if you want to compress the image, use WinImage to load the IMA file and select Image – Defragment Current Image and then click on the Save option (or the floppy disk icon).
Note that the blank images provided have an MS-DOS boot sector and so it will try to load a file called IO.SYS (not provided).
If you want to boot to FreeDOS, use the BLANK_FREEDOS_144.IMA and BLANK_FREEDOS_288.IMA image files.
Tip: Press F3 in RMPrepUSB and use the FreeDOS boot files in the FREEDOS_USB_BOOT folder if you want a FreeDOS-bootable volume with basic FreeDOS boot files.
FREEDOS_288.zip contains basic FreeDos boot files and loads also himem. It contains checkpci.exe which displays PCI IDs.
- \KERNEL.SYS
- \COMFREE.COM
- \FDAUTO.bat
- \FREEDOS
- \CHECKPCI.EXE
- \FDCONFIG.SYS
- \FREEDOS\ATTRIB.COM
- \FREEDOS\COPYING.TXT
- \FREEDOS\EDIT.EXE
- \FREEDOS\EDIT.HLP
- \FREEDOS\FDISK.EXE
- \FREEDOS\FDISK.INI
- \FREEDOS\FORMAT.EXE
- \FREEDOS\PART.EXE
- \FREEDOS\SYS.COM
- \FREEDOS\XCOPY.EXE
- \FREEDOS\himem.exe
For instance, you can add the DOS version of HWInfo to this image.
CREATE AN IMAGE FROM A REAL 1.44MB FLOPPY DISK (OR USB FLOPPY DISK)
To create a real, physical MS-DOS bootable floppy disk, use Windows to right-click on the A: drive icon and then choose format. Click on ‘Create an MS-DOS Startup disk’ to format the floppy disk as an MS-DOS bootable disk. Unless you need all the files on this floppy disk, delete all files EXCEPT IO.SYS, COMMAND.COM and MSDOS.SYS.
If you want to distribute this disk image, you should not use the MS-DOS files as these are illegal to distribute. Instead delete ALL files from the floppy drive A: and copy over a set of FreeDOS boot files (you need at least KERNEL.SYS and COMMAND.COM) then rename KERNEL.SYS to IO.SYS so that it will boot.
If possible, test booting from the new drive (e.g. used a real system or install QEMU Manager and configure it to boot from the floppy drive – see below – item 9).
Assuming you now have a real bootable Drive A; which you wish to now make an image of (and maybe combine it with another floppy disk or add or delete files?), here is what to do:
First, you need to download and install WinImage
- Open WinImage.
- Insert the first floppy disk into your computer. Go to Disk -> Read Disk (Ctrl+R) (ensure ‘Use Floppy A:’ is ticked)
- If including a second floppy insert it into your drive. Go to Image -> Change format… and select 2.88 MB. Next select Image -> Inject… Browse to your floppy drive, select all of the files, and then choose Open. It will ask if you want to inject the files, choose Yes.
- You can also inject files from a folder in a similar way.
- Delete files by right-clicking on them and choosing ‘delete’
- Press the [Insert] key to inject a file
- Use Image -> Defragment current Image (to reduce the size of the image if you later compress it)
- You can use Image -> Information to view how much remaining space there is and the view the CRC32 of the files.
- Now save the file using: File -> Save. Give the image file a name and save as an IMA file by selecting “Image file (*.IMA)” in the “Save as type:” drop-down box .
- If you are using the file in a grub4dos menu, you can compress the file using 7Zip to a .gz file by right-clicking on the file in the 7-Zip GUI, choosing 7-Zip -Add to archive and selecting GZIp as the archive format.
To create an ISO image from a CD or DVD-ROM use Disk – Use CD-ROM x, then Disk – Create CD-ROM ISO image…
USING A USB FLASH DRIVE INSTEAD OF EDITING IN WINIMAGE
If you prefer, you can use a spare USB flash drive to make a pseudo-floppy disk and edit the files on the USB drive directly, as follows:
1. Obtain or make a floppy disk image – e.g. freedos.ima (see below for details)
2. Use RMPrepUSB – File->USB option to copy the floppy disk image onto any spare USB flash drive you happen to have
3. If the USB flash drive is not given a letter automatically in Windows Explorer, then assign a drive letter to it in Disk Manager – e.g. U:
4. Now edit the USB flash drive files in Windows as you would any other disk drive.
5. Save the whole FAT partition as an image using RMPrepUSB USB->File and use 2880SEC as the size (=1.44MB)
Note – testing the image: If you made a bootable floppy image, the USB flash drive that you made, may or may not boot if you actually try it on a computer. It depends on the BIOS of the computer that you plug it into. Some BIOSes may boot it correctly as a floppy disk (A:), others may try to boot it as a hard disk and so the USB drive will fail to boot. Some BIOSes may require you to change a USB Boot BIOS option first before it will boot as a floppy disk. The Asus EeePC 904HA for instance, will successfully boot such an image on a UFD as drive A:. If the UFD has an MBR, and a partition table with two partitions however, it will attempt to boot the UFD as drive C:.
To test a floppy disk image, you can make a bootable USB flash drive using RMPrepUSB and then install grub4dos and place the .IMA or .IMA.GZ image file on the USB drive. Then make a menu.lst as follows:
- title Test Floppy Image is bootable
- map /FLOPPY.IMA (fd0)
- map –hook
- root (fd0)
- # the line below will test if the floppy disk is fully bootable
- chainloader (fd0)+1
- # you can use the line below if you are going to use grub4dos to boot the image file and chainloader (fd0)+1 does not work
- #chainloader /io.sys || chainloader /kernel.sys
Now use the Test using QEMU button in RMPrepUSB to see if it boots.
USING MTOOLS TO CREATE A 1.4MB OR 2.8MB RAW FLOPPY IMAGE
You can create a 1.44MiB floppy disk image or a 2.88MiB floppy disk image using the Windows utility collection mtools (also available in Beta downloads – Tutorial files page or on reboot.pro here).
Mtools 4.0.17 compiled for Windows
http://ubcdcreator.s…4.0.17-win32.7z
Mtools manual page:
http://www.gnu.org/s…ual/mtools.html
To create a non-bootable raw floppy disk (FAT12) image from a Windows command shell window, use the following command:
mformat -f 1440 -v MyDos -C -i c:\testdos.ima ::
or
mformat -f 2880 -v MyDos -C -i c:\testdos.ima ::
Note that MyDos is just the volume label that you want the disk to have and c:\testdos.ima is the name of the file you want to create. Also note that the line ends in two colon characters (i.e. ::) this is the destination drive letter and it must be :: which means the disk is inside the image file and not a real disk like A: or B:. i.e. instead of typing a copy command like ‘copy c:\fred d:\fred’ you use ‘mcopy -i c:\testdos.ima c:\fred ::\fred’
You can manipulate files like this:
mcopy -i c:\testdos.ima file1.exe file2.txt file3.sys :: (copy files into drive :: which is the image drive)
mdel -i c:\testdos.ima ::file1.exe (delete file.exe from inside the image)
minfo -i c:\testdos.ima ::
mdir -i c:\testdos.ima ::
mdir -/ -i c:\testdos.ima :: (same as dir /s in DOS)
mmd -i c:\testdos.ima :: (make a folder inside the image)
mmove ::file1.exe ::file2.exe -i c:\testdos.ima :: (renames file1.exe to file2.exe inside the image file)
The full command list is available here.
Note that the image that the mformat command creates is not a bootable image and it has no boot code. If you want a bootable image, you will need to format or sys the image.
More information about mtools can be found on the reboot,pro forum here.
HOW TO MAKE A FLOPPY DISK IMAGE BOOT TO MS-DOS OR FREEDOS
The floppy disk image you have created may not be bootable. The first sector of the image must contain boot code which will load either KERNEL.SYS (to boot to FreeDos) or IO.SYS (to boot to MS-DOS). So you need to SYS the drive image to put on this boot code. The FreeDos SYS command can put on either of these boot loaders…
To SYS an existing floppy disk image as either a FreeDos bootable or MSDOS bootable (loads IO.SYS) drive, do the following:
- Download the FreeDOS boot CD ISO file from http://www.freedos.org/freedos/files/ – named fdbasecd.iso – copy it to C:\
- Open up a Windows Command Prompt shell (in administrator mode) and change to the RMPrepUSB QEMU folder – e.g. type
- cd “C:\Program Files\RMPrepUSB\Qemu”
- Type the following command to run QEMU –
- qemu.exe -boot d -cdrom c:\fdbasecd.iso -fda c:\test.ima
- – this assumes your floppy image is at C:\test.ima.
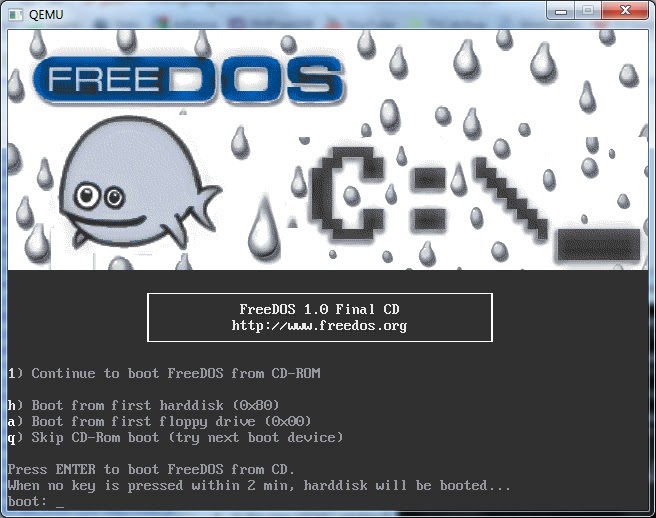
- In the new QEMU window type 1 followed by the Enter key
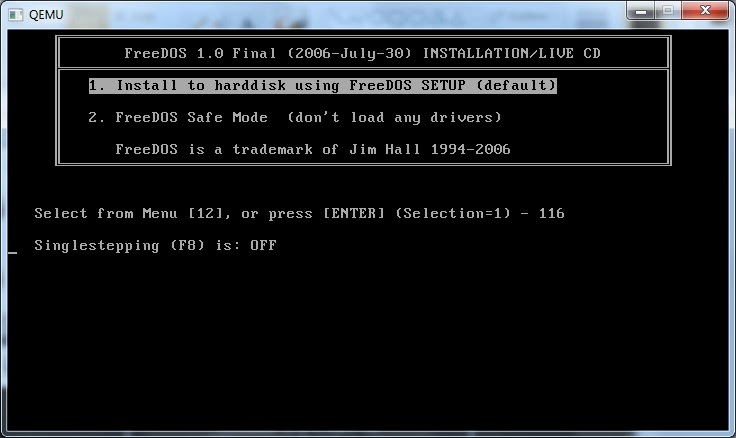
- At the next menu type 2 for FreeDos safe mode.
- You can now type one of the following commands:
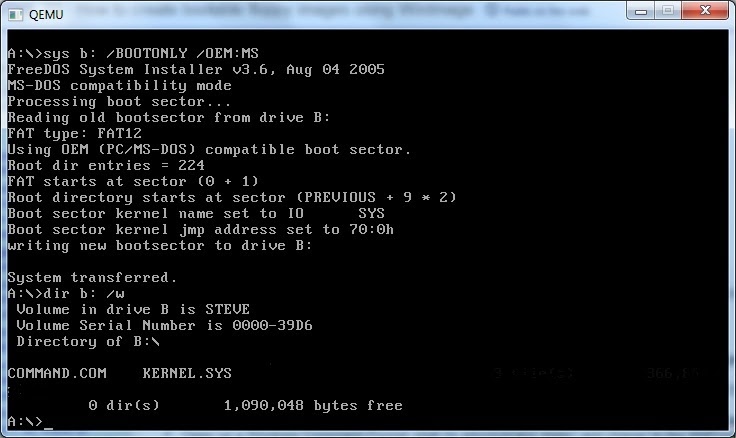
- sys B: /BOOTONLY /OEM:MS (for MS-DOS – so it will try to load IO.SYS when it boots)
- or
- sys B: (for FreeDos – so it will try to load KERNEL.SYS when it boots)
- Quit the QEMU session (click on the Windows X icon at the top right-hand corner)
- If you used the SYS B: command in step 6 you now have a bootable FreeDos image which will contain KERNEL.SYS and COMMAND.COM.
- If you used the first command (/OEM:MS) in step 6, you will need to add some MS-DOS boot files before you can boot from the image. You will need to add IO.SYS and then any other boot files required such as MSDOS.SYS and COMMAND.COM.
- To test if your new image actually boots, use the QEMU command
- qemu.exe -boot a -fda c:\test.ima
- Good luck!
MAKING A FREEDOS GHOST BOOT FLOPPY DISK IMAGE FOR SATA CD/DVD DRIVE (S-ODD) SYSTEMS
DOS may not detect SATA CD drives under DOS when booting from a CD/DVD due to the lack of a suitable DOS SATA driver. If you boot to DOS on an AHCI system (one that does not have IDE leegacy mode options in the BIOS for instance), you may not gain access to any Sata Optical drives even though you load shcdx86.sys (or mscdex.sys if using MS-DOS).
The FREEDOS_SATA_FOR_GHOST_288.IMA image file is a 2.88MB FreeDos bootable floppy disk image containing a DOS AHCI SATA driver (ahci.sys), DOS CD-ROM driver (shcdx86.com) and a DOS mouse driver (mouse.com) . The AHCI.sys driver should detect SATA AHCI Optical Disk Drives and assign them a drive letter. All you need to do is open up the image file using WinImage, import your DOS version of Ghost.exe (not included in the image for copyright reasons) and save the file. You will then have a bootable DOS Ghost floppy image which should work with most SATA systems as well as IDE systems.
If you have a grub4dos bootable CD or DVD, you can add the following menu.lst entry to boot this image:
- iftitle [if exist /freedos_sata_for_Ghost_288.ima] FreeDOS Ghost with AHCI SATA Optical Disk Drive support\nLoads AHCI driver and runs Ghost.exe
- map /freedos_sata_for_Ghost_288.ima (fd0) || map –mem /freedos_sata_for_Ghost_288.ima (fd0)
- map –hook
- root (fd0)
- chainloader /kernel.sys || chainloader +1
CREATE A LARGE ‘FLOPPY’ IMAGE
1. Install Olof’s ImDisk onto your Windows system
2. In the Control Panel, run the Imdisk Virtual Disk Driver and click the Mount new button
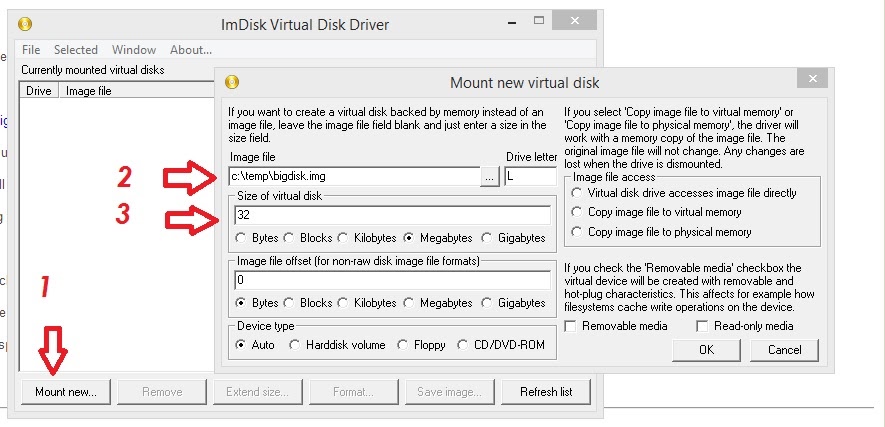
3. Fill in the filename and the size and click on OK
3. Now you will have a L: drive volume which will be formatted and empty. Add your files to it as required. Tip: Press F3 in RMPrepUSB and use the FreeDOS boot files in the FREEDOS_USB_BOOT folder if you want a DOS-bootable volume.
4. When finished, dismount the L: volume using the Remove button (or right-click on L: and choose ‘Unmount ImDisk virtual disk’)
To re-edit the image, right-click on it and choose ‘Mount with ImDisk’ – when finished, right-click and choose ‘Unmount ImDisk virtual disk’
Tip: The image probably won’t boot unless you specify the boot file in a grub4dos menu (.e.g. map /xxx.img (fd) map –hook rot (fd0) chainloader /io.sys) so don’t use chainloader (fd0)+1 if it hasn’t got the correct boot sector.
Click here (OneDrive folder) if you cannot find any file mentioned in the articles on this site or Contact Me.