
Table of Contents
The instructions below will allow you to add a Windows 98 ISO file to your Easy2Boot drive and install Win98 to an internal hard disk.
It should also work for Windows ME.
New eBook on grub4dos is now available. Over 170 pages.
INTRODUCTION
If you would like to be able to re-install Windows 98 or Me onto a system that perhaps has a broken CD-ROM, then you can do so using Easy2Boot.
REQUIREMENTS
Before we start however, please remember that Win98 is a very old Operating System and so is quite tricky to install on modern systems.
The 98/Me browser is very old – most websites will not display correctly in any Win98/Me browser, so internet access is extremely limited!
Check here for a list of compatible mainboards.
Please check the following requirements before you begin!
- The target system must be able to boot from a USB drive (Flash or HDD)
- The target system must have an IDE hard disk drive (SATA drives may not work – set the ‘Legacy/IDE’ setting in the BIOS setup menu if you have a SATA hard drive fitted – do not use ‘AHCI’)
- Older system BIOSes may have a 137GB hard disk limit – installing onto a hard disk larger than 137GB may cause problems (also using a USB Hard Disk larger than 137GB may cause problems – E2B will warn you if this is the case) – see here for more details.
- Your target system will need 256MB or more of memory (the ISO contents are copied to RAM) – however, systems with more than 1GB may also cause memory problems.
- You will need a utility to delete some folders from inside the Win98SE ISO – e.g. Daemon Tools Pro or UltraISO (so you don’t lose the boot sectors from the ISO).
- Win98 may not have the correct drivers for your audio, network and graphics devices
- Windows 98 SE ISO (you will have to obtain this yourself) – the ISO can be bootable (preferred) or non-bootable. Try here (OEM Full is bootable) or here.
- (optional) Windows 98 SE 1.44Mb floppy .img image file (you will have to obtain this yourself) – only required if the Win98 ISO is not bootable.
If you wish to try this by using a Virtual Machine (e.g. Oracle Virtual Box), ensure you configure it for Windows 98, use a small amount of memory for Display VGA memory and not more than 1GB of system memory (RAM). Use an IDE virtual hard disk.
PREPARE THE USB DRIVE
1. Make an E2B bootable USB drive from www.easy2boot.com
2. Check that you can boot the E2B USB drive on your target system – if not then you cannot proceed any further!
3. (optional) Edit the Windows 98 SE ISO file that you have obtained and leave only the files in the root (top level) and the \win98 folder.
Save the ISO file. I used Daemon Tools Pro for this. UltraISO also works.
The reason that we need to delete the other folders is that the E2B copy process will fail if there are too many files.
Also, we don’t need these folders to install Windows 98.
If you like, you can try the ISO without editing it first, but it may fail to load or install properly.
4. If the ISO is not bootable (check with 7Zip – Open Archive, look for a [BOOT] folder containing a Bootable_1.44M.img file) then you will need to find and download an MS-DOS floppy disk image.
If the ISO does contain a bootable 1.44Mb floppy image as [BOOT], you only need the ISO file and you do not need a separate .IMG file.
4a. If your Win98SE ISO is bootable:
Simply copy the reduced-size ISO (approx 180MB) to the E2B USB drive \_ISO\MAINMENU folder and rename the file to have the .ISODOS01 file extension
(optional) Create a .txt file of the same name as the Win98SE ISO containing the menu entry that you want to appear in the E2B Main menu instead of just the name of the ISODOS01 file – e.g.:
title Win98SE Install (ISO)\n Choose 2 Boot from CD-ROM then 3 without CD-ROM option 2\n Run FDISK to partition the HDD\n Then reboot and run Format.\n Change to drive B: and type Setup to install Win98
This completes the USB drive preparation if your Win98SE ISO was bootable.
4b. If your Win98SE ISO is not bootable:
Copy the reduced-size Win98SE ISO and the .IMG file to the \_ISO\MAINMENU\Win98 folder (you will need to make a Win98 folder on the E2B USB drive)
Use Notepad to create a new file at \_ISO\MAINMENU\InstWin98SE.mnu with the following contents (change the filenames in bold type to match your filenames):
- title Win98SE Install (ISO+FD IMG)\n Choose non-CDROM option 2\n Run FDISK to partition the HDD\n Then reboot and run Format.\n Change to drive B: and type Setup
- set ISO=(bd)/_ISO/MAINMENU/Win98/Win98se.iso
- map /_ISO/MAINMENU/Win98/Windows98_se.img (fd0)
- map %ISO% (0xff)
- cat –length=0 %ISO% ;; set /a LEN=*0x8290 ;; echo Length of %ISO% is %LEN% bytes
- set /a LEN=%LEN%/512
- # Allow for PBR sectors etc. – must be FAT16 so over 0x20000
- set /a LEN=%LEN%+0x1000
- if %LEN%<=0x20000 set /a LEN=0x20000+0
- echo FILE IS %LEN% sectors
- pause –wait=3 Drive B: Length=%LEN% sectors
- # call the copy batch file – first parameter is either (fd0) or (fd1) – next parameter is size of virtual drive (0x100000=512MiB)
- call (bd)/%grub%/copyff.g4b (fd1) %LEN%
- pause –wait=3 PLEASE NOTE: Contents of CD are now on drive B:
- # set number of floppies seen by BIOS – must be 2 if using (fd1) instead of (fd0)
- map (hd0) (hd1)
- map (hd1) (hd0)
- map –hook
- map –floppies=2
- root (fd0)
- chainloader /io.sys || chainloader /kernel.sys || chainloader (0xff)
5. Be sure to run WinContig (RMPrepUSB – Ctrl+F2) to make all the files contiguous.
You should now have a bootable USB drive with which can install Win98SE.
INSTALLING WINDOWS 98SE
1. Boot from the USB E2B drive on the target system.
Select the .isodos01 file (or the Win98SE Install menu entry) and run it.
If you see some error messages as the files are copied to memory, this is usually because the ISO contains files with long filenames – these are not required for the install process and so won’t cause a problem.
Note that Win98 will make the first hard disk partition Active and MS-DOS bootable. Therefore the first internal hard disk will be modified by this process even if you install Win98 to a different hard disk or partition!
2. If you see a message to boot from the Hard Disk or CD-ROM, choose the ‘Boot from CD-ROM’ option. Note: After 10 seconds it may automatically try to boot from the hard drive – so watch for the menu – don’t walk away!
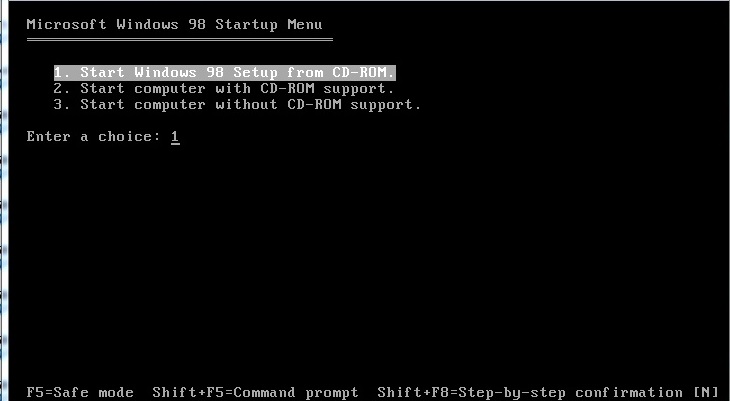
3. When you see a message like that below, choose Option 3 to boot without CD-ROM support:
4. You should now be at the MS-DOS A:\> prompt.
We need to format the target system’s drive as FAT32.
Type FDISK and press the ENTER key and answer ‘Y’ to the questions about large disk support.
Now select option 5 and check that Disk 1 is the drive that you want to install Win98 onto.
If it is not then be warned that if you proceed, the Win98 Setup process may make boot loader changes to Disk 1 anyway as it will treat it as the Win98 boot drive even if you later choose to install Win98 to a different drive volume!
5. Press <ESC> to return to the main FDISK Options menu and use the menu to create a DOS Primary bootable partition on Disk 1.
When this has been created, you must reboot again from the Win98SE ISO using E2B exactly as before (repeat steps 1-4 above).
Note: FDISK may be old and may not work with large hard drives properly! In 1998, all hard disks were IDE\ATAPI (not SATA) and were smaller than 137GB!
You may have problems if your hard disk is larger than 137GB. FDISK may report ‘weird’ sizes.
6. Now we can format the new partition. Run FDISK again and choose Option 5 again – check that Drive C: is on the target drive (we don’t want to format our USB drive!).
If all looks OK, quit FDISK and type
B:\Win98\FORMAT C: /q
to format the drive. (on Windows ME, format.com will be in the B:\Win9x folder).
7. Now we are ready to install Windows 98 to the blank, freshly formatted (FAT32) drive C:.
At the MS-DOS command prompt, type B: and press the ENTER key to switch to the B: drive.
Now type SETUP and then press the ENTER key. This starts the Windows install process.
If you get an error about a TEMP folder, type the following commands to make Setup use a folder on the B: drive as a temporary folder:
mkdir B:\TEMP
setup /T:b:\temp
Use C:\Windows as the install folder.
When requested to make Startup (floppy) Disk, click Next and then Cancel.
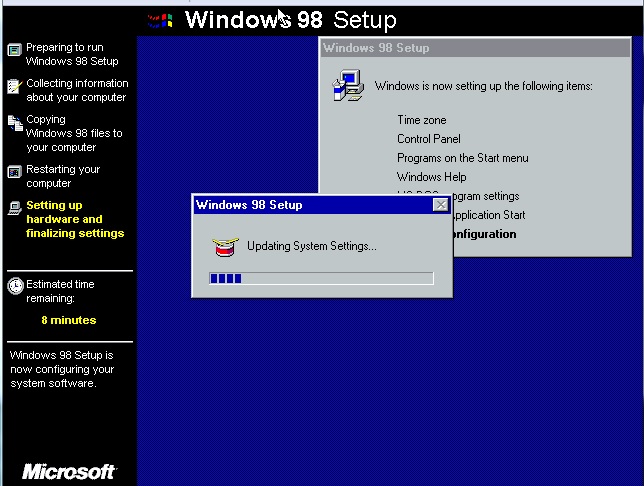
8. The Win98 Setup process will restart several times – you can remove the E2B USB drive at this point so that it reboots directly from the internal hard disk.
If you boot from the E2B USB key (e.g. if using a VM) then just press F7 in the E2B menu to boot from the internal hard disk again.
I successfully used a Win98 key BPKBQ-?????-?????-?????-28FW3 after the first restart of a Retail Win98SE install (Google for it!).
Unofficial English Win98SE Service Pack here.
If you find your E2B USB drive no longer boots to the E2B menu, try RMPrepUSB – Install grub4dos – MBR=Y to fix it.