
Table of Contents
WARNING: Please use this hacker code responsibly!!!
Cold Boot Attack
Easy2Boot Scraper demonstration YouTube video here.
In Episode 521 of Hak5 ‘Cold Boot Attack‘, Darren describes the use of a USB drive to save the entire contents of a computers memory (RAM) to a flash drive.
Watch this video for more insight. The original paper (PDF) is available here. Recent 2018 news here and 2015 DDR2\\DDR3 video here.
This is based on the work of Princeton University who developed the original code. It is suggested that some RAM retains it’s data for several minutes after switch-off and that you can even remove the DIMMs from a system after using freezer spray, put them in another system and then switch it on and save the memory contents to a USB drive!
WARNING: The code in scraper.bin writes to the drive 0 which will be the boot drive – however, if something goes wrong, there is a small possibility that it may destroy all the partitions on your internal hard disk! It shouldn’t go wrong – but it might! So test this on a system that does not have important files on the hard disk, just in case! You have been warned!
I suggest testing on a Virtual Machine rather than a real system first.
For test purposes, you can reduce the amount of RAM in the system by removing one bank of DIMMs before you start. This will make dumping and analysing faster.
Modern PCs
Note: Some modern BIOSes will now wipe memory on power-up to prevent such attacks – in this case you may find that the saved data has been wiped. This can be prevented by plugging the DIMMs into an older system which does not do this or a Win10 system which has been cleanly shut down or by patching the firmware (see this video).
Note: If you only have one PC, you can still simulate a cold boot attack using two sets of DIMMs as follows:
- 1. Boot target system – freeze DIMMs – switch off power
- 2. Replace DIMMs – switch on power – boot to Windows – shutdown Windows nicely (MOR bit will be 0) (keep first set of DIMMs cold during this time!).
- 3. Replace memory with first set of DIMMs, Legacy/BIOS boot to USB – UEFI is not supported (must not boot from large and fast USB disk!) and perform cold boot attack.
INSTRUCTIONS TO MAKE A DEDICATED ‘SCRAPER’ 32-BIT + 64-BIT USB DRIVE
(You can add also add the files to an Easy2Boot multiboot USB drive by omitting steps 1 and 2.
1. Select a FAST USB 3.0 drive – preferably a USB SSD or HDD or a SilverStone M.2 USB enclosure + SATA M.2 memory drive is good!
2. Create an NTFS USB drive containing a single large NTFS PRIMARY partition. You can use RMPrepUSB for this or any partition/format tool – e.g. EaseUS Home Partition Master – OR – make an new Easy2Boot USB drive.
3. Download scraper.zip which has all the files you need for a grub4dos USB drive (except for ram.img)…
Note: The original scraper pre-compiled 32-bit and 64-bit versions of scraper.bin available here on github as a ZIP file (thanks to Basel Sayeh).
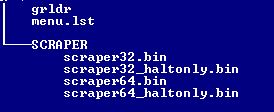
4. Extract all the files from the Scraper.ZIP file onto the root of the USB drive.
(If using an E2B USB drive, do not overwrite any E2B files – do not overwrite the existing \menu.lst file or \grldr file).
5. Run Diskmgmt.msc in Windows and create a new RAM.VHD file on any suitable Windows drive using the Action – Create VHD option (see screenshot below) – use a FIXED VHD type and name it RAM.
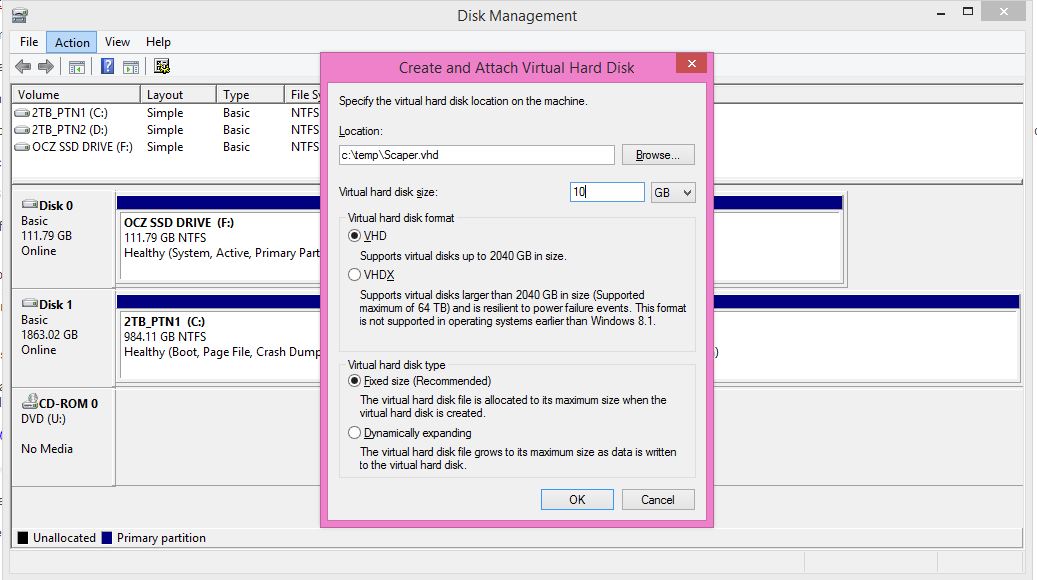
The size should be as large as the largest RAM that you intend to scrape – 16GB is probably large enough for most systems – so increase the size slightly above that.
6. Copy the new RAM.VHD file to the USB drive \SCRAPER folder and rename the file to RAM.IMG (not RAM.VHD.IMG or RAM.IMG.VHD but RAM.IMG).
The essential files in the /scraper folder are shown below:
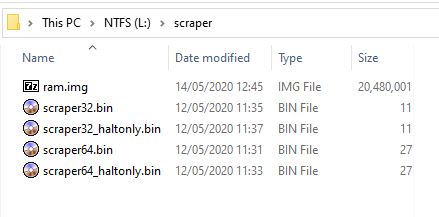
Note: The large ram.img file should be contiguous. Ensure that you run Defraggler or WinContig to make the file contiguous.
The root folder should contain \menu.lst and \grldr.
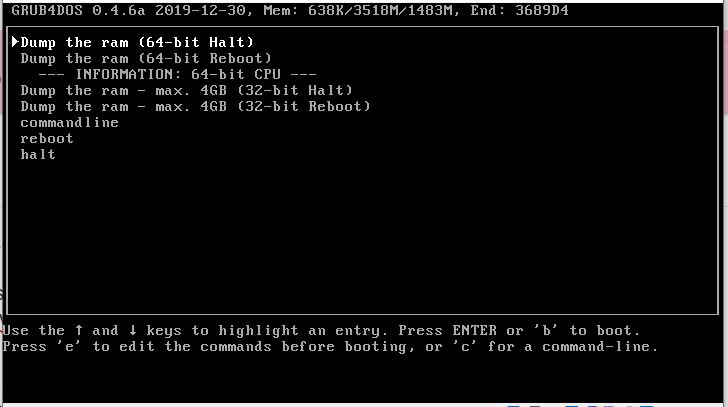
7. If you are using an Easy2Boot USB drive, cut and paste the menu text below (or use the contents of the menu.lst in the Scraper.zip download) to make a new \ISO\UTILITIES\Scraper.mnu file (i.e. extract the \menu.lst to the \_ISO\UTILITIES folder and rename the file as Scraper.mnu) – otherwise, if not using an E2B USB drive, just skip down to Step 8.
timeout 10
set ERR=
if not exist (hd0,0)/scraper/ram.img echo (hd0,0)/scraper/ram.img is missing! && set ERR=1
if not exist (hd0,0)/scraper/scraper64_haltonly.bin echo (hd0,0)/scraper/scraper64_haltonly.bin is missing! && set ERR=1
if not exist (hd0,0)/scraper/scraper64.bin echo (hd0,0)/scraper/scraper64.bin is missing! && set ERR=1
if not exist (hd0,0)/scraper/scraper64.bin echo (hd0,0)/scraper/scraper64.bin is missing! && set ERR=1
if not exist (hd0,0)/scraper/scraper32_haltonly.bin echo (hd0,0)/scraper/scraper32_haltonly.bin is missing! && set ERR=1
echo
echo
if "%ERR%"=="1" pause ERROR: Press ENTER to continue...


iftitle [checkrange 2,3 is64bit] Dump the ram (64-bit Halt)
map (hd0) (hd1)
map --hook
chainloader --force --boot-cs=0x7c0 --boot-ip=0x200 (hd1,0)/scraper/scraper64_haltonly.bin
map (hd1,0)/scraper/ram.img (hd0)
map --hook
rootnoverify (hd0,0)


iftitle [checkrange 2,3 is64bit] Dump the ram (64-bit Reboot)
map (hd0) (hd1)
map --hook
chainloader --force --boot-cs=0x7c0 --boot-ip=0x200 (hd1,0)/scraper/scraper64.bin
map (hd1,0)/scraper/ram.img (hd0)
map --hook
rootnoverify (hd0,0)


iftitle [checkrange 2,3 is64bit] --- INFORMATION: 64-bit CPU ---
errorcheck off


iftitle [checkrange 0,1 is64bit] --- INFORMATION: 32-bit CPU ---
errorcheck off


title Dump the ram - max. 4GB (32-bit Halt)
map (hd0) (hd1)
map --hook
chainloader --force --boot-cs=0x7c0 --boot-ip=0x200 (hd1,0)/scraper/scraper32_haltonly.bin
map (hd1,0)/scraper/ram.img (hd0)
map --hook
rootnoverify (hd0,0)


title Dump the ram - max. 4GB (32-bit Reboot)
map (hd0) (hd1)
map --hook
chainloader --force --boot-cs=0x7c0 --boot-ip=0x200 (hd1,0)/scraper/scraper32.bin
map (hd1,0)/scraper/ram.img (hd0)
map --hook
rootnoverify (hd0,0)


title commandline
commandline


title reboot
reboot


title halt
halt
8. If NOT using Easy2Boot – run RMPrepUSB.exe – Install grub4dos – Yes (MBR) to install grub4dos onto the USB drive (not required if using an E2B drive).
This step is not required if you have used an E2B USB drive.
Tip: You can use the QEMU button in RMPrepUSB to test if the USB drive will now boot to the grub4dos menu.
That’s it – now you can boot to the USB drive on a real system and scrape! On an E2B drive, the Scraper menus will be in the Utilities sub-menu.
I suggest you keep a copy of the original RAM.VHD file because it will be ‘clean’ and you can use it again for the next time. Each time you want to do a new ‘scrape’ you should delete the old RAM.IMG file and copy the ‘clean’ RAM.VHD file again and rename it to RAM.IMG.
Note that the E2B menu system uses more memory than a simple grub4dos menu and so it will destroy some more data stored in RAM, so it is better to use a dedicated ‘Scraper’ USB drive.
TROUBLESHOOTING
Some BIOSes do not support writes to USB devices past 137GB (128GiB). So you should ensure that the scraper.vhd file is within 137GB from the start of the USB drive.
Making sense of the recovered data
You will now need to resort to some linux hacking tools to find out what is in the data file – I leave this bit up to you!
However, one thing you could try is to use PhotoRec to scan the USB Flash drive to try to find recognisable file formats within the memory dump – such as .jpg or .doc files. If it finds any files, it will make a copy of them for you. You can then try to view or load them later to see if they are OK or corrupt.
— OLDER INSTRUCTIONS (DEPRECATED – DO NOT USE) —
The instructions below are now outdated.
MAKE A DEDICATED ‘SCRAPER’ USB DRIVE
You will need a USB drive that is at least as big as the size of the system’s memory that you run it on. For example, if the target system has 8GB of system RAM, then you will need an 8GB or larger USB drive.
To make such a USB drive you should…
1. Download the source files (or try GitHub BIOS_memimage 1.2) and compile it to make a 32-bit of scraper.bin.
The 32-bit version of scraper.bin will only save a maximum of 4GB of memory.
A pre-compiled 32-bit version of scraper.bin and usbdump has been provided by ‘Jamil’ – DOWNLOAD is here.
A pre-compiled 64-bit version of scraper.bin is available here (thanks to Basel Sayeh). The menu.lst provided requires two partitions and a ram.img file. See below for instructions.
2. Select a spare USB drive (the contents of this drive will be destroyed during this preparation process) – it is best to use the fastest USB drive you have, as saving 8GB of memory to a USB drive can take quite a while!
A USB 3.0 drive with a fast write speed (e.g. SilverStone M.2 USB enclosure + SATA M.2 memory drive) is good!
3. Select the drive in RMPrepUSB and use the File->Drive button, select the scraper.bin file and a USB start and File start address of 0 and length of 0 (defaults).
4. You should now have a FAT16 formatted USB drive with scraper.bin as the boot code.
Note: if now you put any files on this drive, they will be destroyed when you boot from it, so don’t bother adding any files!
To use the USB drive, just boot from it on the target system, it should begin to immediately copy all system memory to the sectors on the USB drive (and destroy any files on it in the process).
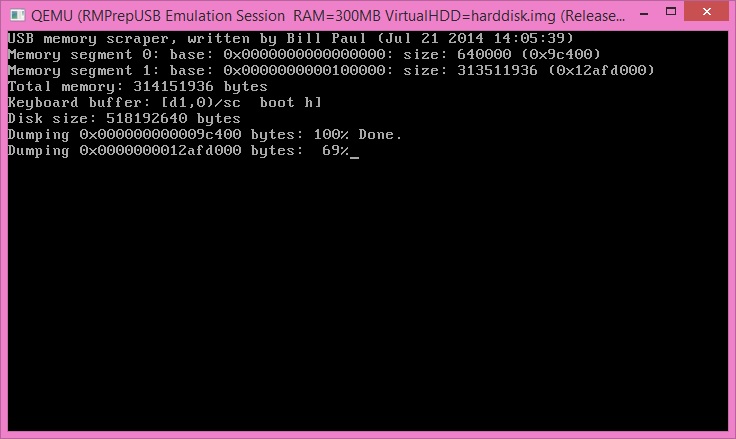
Note that the last keyboard characters from the keyboard buffer are also displayed to the user!
Here is the dump on a 64-bit system with 5GB of RAM (VirtualBox).
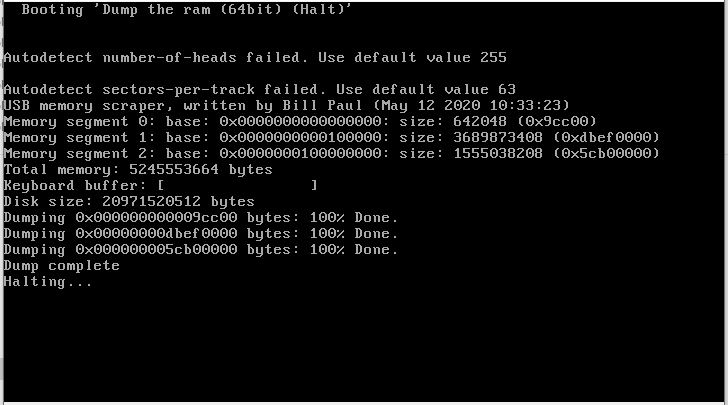
When it finishes, it will reboot the system.
You can then use the linux program usbdump (also in the download) to make a file from the data that was collected on the USB drive. This will retrieve the data from the sectors of the USB drive.
What scraper.bin does is write to sector 126 and beyond, so you cannot use this drive to store files on. The actual memory data storage begins at sector 128.
Recently, Jamil contacted me and wanted a way to add scraper.bin to an Easy2Boot multiboot USB drive.
The first problem was how to get scraper.bin to boot directly from grub4dos.
This was achieved by using the following chainloader grub4dos command.
chainloader –force –boot-cs=0x7c0 –boot-ip=0x200 /scraper.bin
The problem with this was that when scraper ran, it would immediately destroy the filesystem on the USB drive and all the Easy2Boot files!
This problem was overcome by Jamil, by mapping a virtual disk to hd0 and then pretending to boot from hd0 (the USB drive) so that the scraper code saw the virtual disk as hd0.
Even if the size of the target system’s memory was larger than the size of the virtual disk, it would stop writing sectors when the end of the virtual disk was reached.
In this way, the contents of the E2B drive (the files, etc.) were protected.
Note: if the USB drive boots OK under QEMU or a VM, but does not boot on a real system, ensure that you MBR\CSM boot (UEFI booting is not supported). If you have a UEFI system, disable Secure Boot and enable Legacy\CSM booting.
If it still does not boot, try creating a small extra primary partition at the very end of the USB drive using EaseUS Home Partition Master. The partition does not need to be formatted and it does not matter if the partition contents is destroyed during ‘dumping. of an image. Some BIOSes may need to see two partitions in order to boot from the USB drive.
HOW TO ADD 32-BIT SCRAPER.BIN TO EASY2BOOT (OR A GRUB4DOS BOOTABLE USB DRIVE)
1. Create a Virtual Hard Disk (.vhd) file using Windows Disk Management (click on the bottom pane, then click Action – Create VHD – enter the path of the VHD and size (ensure you have ‘Fixed size’ selected)
The VHD file needs to be at least as large as the target’s system memory. You must specify a destination on your internal hard disk (not the USB drive).
Right-click on the newly mounted VHD in the bottom window (extreme left ‘Disk x’ box) and click ‘Detach‘ to detach it. We will now have a large .VHD file full of 00 bytes.
Note: The .VHD file is just a large empty file, instead of using Windows to make it, you can use any other method (e.g. dd if=/dev/nul or fsutil file createnew)
2. Copy the large vhd file (it does not need to be ‘initialised’ or formatted) to the root of your bootable Easy2Boot\grub4dos USB drive.
3. Copy the scraper.bin file to the root of your USB drive
4. Create a .mnu file (e.g. \_ISO\MAINMENU\MNU\scraper.mnu) (this file is in the download) – if using just grub4dos then create a \menu.lst file.
- title Capture all RAM (scraper.bin)\n Dumps all RAM to Scraper.vhd file
- errorcheck on
- debug on
- # map the vhd to hd0
- map –heads=0 –sectors-per-track=0 /Scraper.vhd (hd0)
- # map the USB drive to hd1
- map (hd0) (hd1)
- # hook the BIOS interrupts so the mapping takes affect
- map –hook
- # set the root (boot) device as hd0
- rootnoverify (hd0,0)
- # load the boot code from scraper.bin and run the code in the 2nd sector
- chainloader –force –boot-cs=0x7c0 –boot-ip=0x200 (hd1,0)/scraper.bin
This grub4dos code maps scraper.vhd as hd0 and then changes hd0 (the USB drive) to hd1. It then runs scraper.bin as if it was booting from hd0.
That’s it!
An alternative menu which does not rely on using special cs and ip register values is:
- title Capture all RAM 32 (scraper.bin)\n Dumps all RAM to Scraper.vhd file
- errorcheck on
- debug on
- # map the vhd to hd0
- map –heads=0 –sectors-per-track=0 /Scraper.vhd (hd0)
- # map the USB drive to hd1
- map (hd0) (hd1)
- # hook the BIOS interrupts so the mapping takes affect
- map –hook
- # set the root (boot) device as hd0
- rootnoverify (hd0,0)
- # copy scraper.bin to VHD (disk 0) – assumes code is smaller than 80Kb
- dd if=(hd1,0)/scraper.bin of=(hd0)0+160
- # boot to disk 0 as a BIOS would
- chainloader (hd0)0+1
- boot
If you wish, for Easy2Boot, you can move the scraper.bin and VHD file to the same folder as the .mnu file – and then alter the paths in the .mnu file (e.g. map $HOME$/Scraper.vhd (hd0) and … (hd1,0)$HOME$/scraper.bin )
When you have captured the memory of a target system, you can use the usbdump linux program (e.g. usbdump /dev/sda4 > memdump)
You could just analyse the data in the .vhd file, however, it may be much larger than the amount of memory that you captured and the end of the file may contain data from previous captures.
or
You can Attach the VHD to your Windows system as a unformatted drive using Windows Disk Management and then use RMPrepUSB – Drive->File button, select the ‘attached’ VHD drive in the RMPrepUSB Drive List box (you will need to change the RMPrepUSB – Settings to allow Hard Disks to be seen) and specify a USB start address of 128SEC, a length of whatever the size of RAM was on the captured system and a File Start of 0. The Total Memory size is displayed on the screen as scraper runs. Divide this by 512 to get the number of sectors you need to save.
Alternatively, ensure you copy the .VHD file you made using Disk Management on your hard disk to the USB drive each time you are about to use it. The VHD file will contain all 00 bytes.
You can then analyse the data file using the usual forensic\hacker techniques. How you actually do this, I will leave up to you to find out as it is not within the scope of this article!
Note that E2B uses several MBs of memory when it boots to the E2B menu and so the final memory dump will not be as ‘pure’ as if you used a dedicated ‘scraper.bin’ USB drive (as described above) and so some of the lower memory will be overwritten by grub4dos and E2B when it boots to the E2B menu system.