
Table of Contents
INTRODUCTION
This tutorial describes how to switch a Windows XP computer from IDE mode to AHCI mode.
Modern computers use SATA hard disks. These are normally used with AHCI mass storage drivers. However, XP AHCI drivers are not included in the standard Microsoft XP install CD, and so it is often easiest to change the hard disk BIOS mode to ‘Legacy IDE’ mode, install XP and then after XP is up and running, switch over to AHCI mode.
Note: There is very little advantage to be gained if running Windows XP in AHCI mode, so unless you have a specific need to switch to AHCI mode, I would recommend staying in the IDE mode.
This method, if done incorrectly (e.g. you choose the wrong driver), may result in a non-booting XP system. You have been warned!
The following method details an Atom based netbook which has been installed in IDE mode and you now wish to change over to use the hard disk in AHCI mode (in this case using the NM10 AHCI driver mass storage SATA driver).
REQUIREMENTS
You will need to find the correct AHCI driver files for your particular SATA controller. These can normally be downloaded from the manufacturers website. You need at least one .INF file and one or more other files, one of which is normally a .SYS file. These should all be downloaded to a folder on your target XP system whilst it is in IDE mode.
METHOD
Unsupported embed
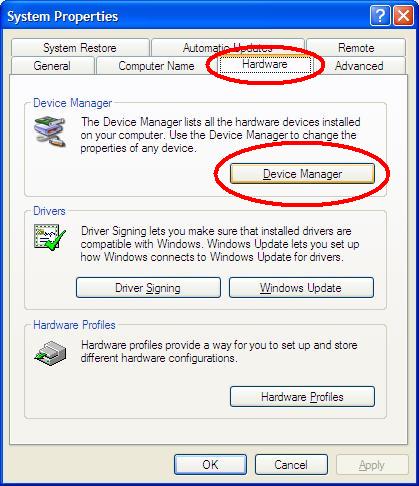
1. Boot to Windows XP on the target system (in IDE mode) and login as an Administrator. 2. Hold down the Windows key (the wavy flag key on the left of the spacebar) and then press and release the Pause/break key. You should see a System Properties window (see image below). 3. Click the Hardware tab and then click the Device Manager button. 4. Expand the IDE ATA/ATAPI Controllers section by clicking on the + sign
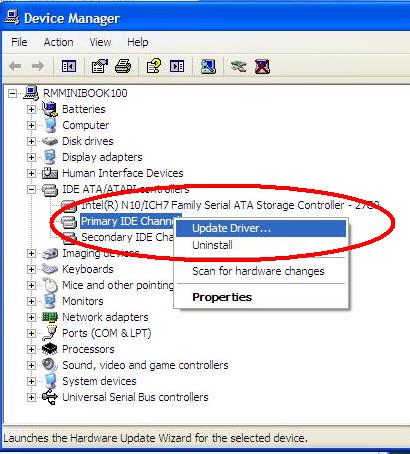
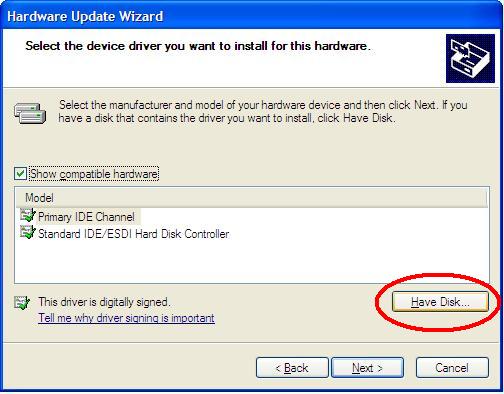
5. Click once on the ‘Primary IDE channel’ item to select it.

6. Right-click Primary IDE channel and then select Update Driver.
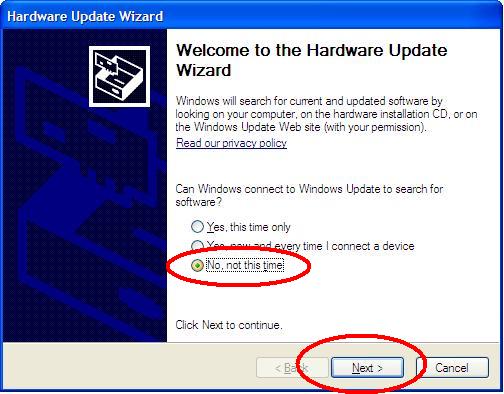
7. Select ‘Not this time’ radio button and then click Next.
8. Select ‘Install from a list’ radio button and then click Next.

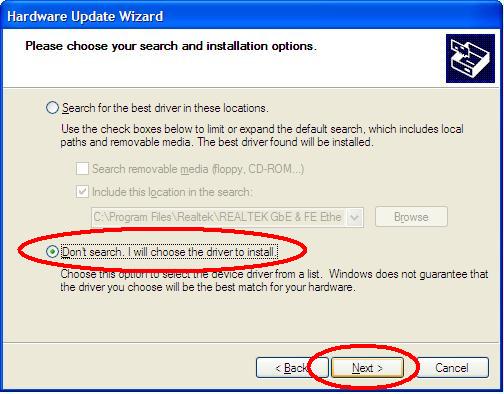
9. Select ‘Don’t search’ radio button and then click Next.
10. Click Have Disk.
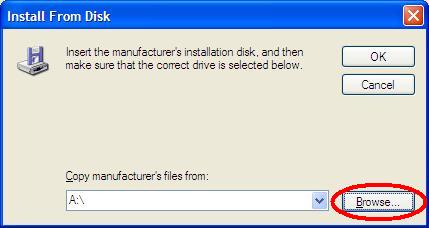
11. Click Browse.
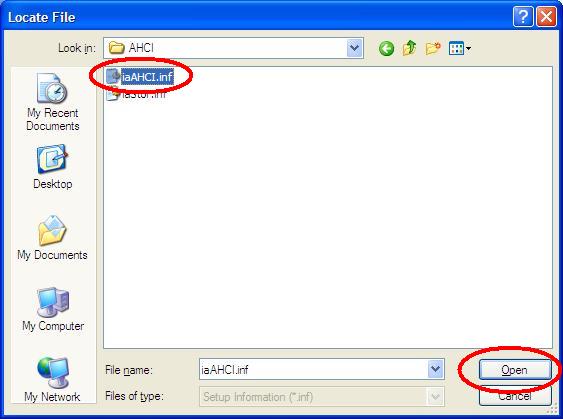
12. Browse to your AHCI driver folder and click on the AHCI.inf file (the name may vary depending on your chipset) and then click Open. Make sure you choose the AHCI inf file and not the RAID storage inf file.
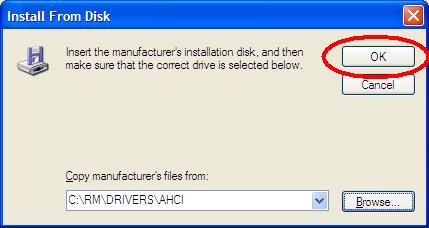
13. From the drop-down menu, select the correct folder where your AHCI drivers are located (if required), and then click OK.
14. Ensure that the correct Chipset driver is shown and then click Next.
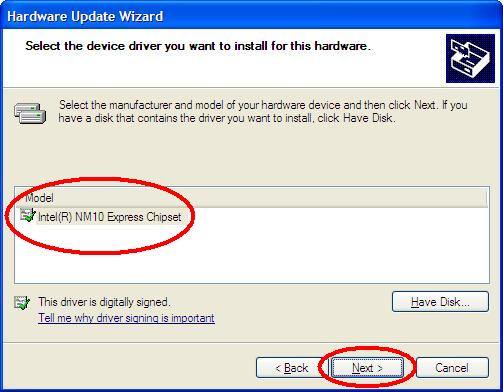
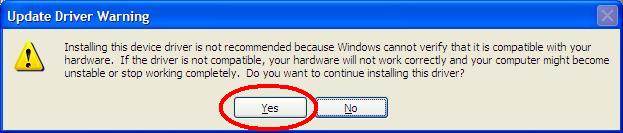
15. Ignore the warning and click Yes.
16. Now, click Finish.
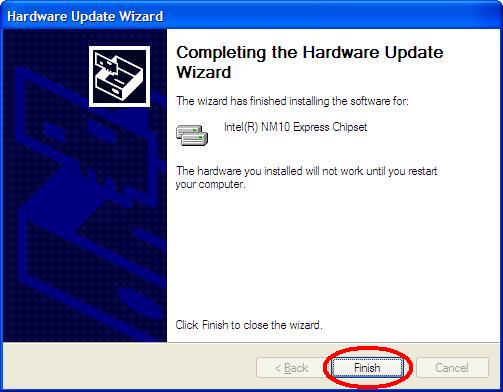
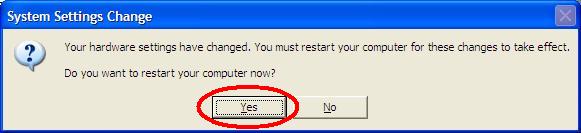
Click Yes, to restart the computer.
17. When the computer restarts, press the Del key (or whatever key is correct for your BIOS – e.g. F1) to enter the BIOS menu as you did before.
Now, change the Hard Disk AHCI options to Enhanced and/or Enabled.
Save the BIOS changes and then press Enter to reboot.
When XP reboots, you should see another ‘System Settings have changed’ prompt – restart the system again (may require several reboots).
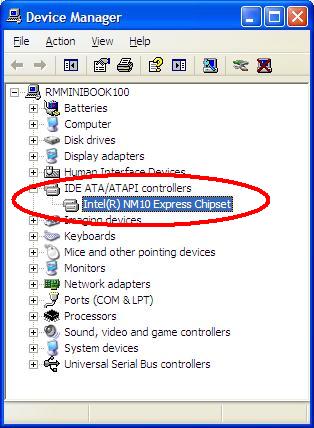
18. Now check that the correct AHCI chipset driver has been successfully installed (for an example, see image below).
TROUBLESHOOTING
Blue Screen of Death
If you have a BSOD (e.g. 0x0000007B error) after changing the BIOS to AHCI mode in Step 17, simply change the BIOS settings back to IDE mode and try again.
With any luck it should boot back to XP again – if it does not then you may have trashed the OS by installing the wrong driver – try using the F8 key to boot in Safe Mode (in IDE BIOS mode).
If that does not work, try the BIOS is AHCI mode + Safe Mode. If that doesn’t work, you will need to re-install XP!
Identifying the correct AHCI driver
You need to determine what chipset you have and then find the correct driver for the SATA AHCI interface.
One way to find the PCI ID of the SATA controller is as follows:
1. Make a bootable USB Flash drive using RMPrepUSB – choose the FreeDOS option and allow RMPrepUSB to set the Copy OS folder to .\FREEDOS_USB_BOOT, use FAT32 and BOOT AS HDD options and then click on 6 Prepare Drive to format the USB drive as a bootable FreeDOS USB pen.
2. Check using the RMPrepUSB F11 key that the USB drive will boot and select the 2 Boot FreeDos as Hard Disk option, check that it boots to the FreeDOS command prompt inside the QEMU emulator.
3. Insert the USB Flash drive into a USB 2.0 port of your target system
4. Reboot you XP Windows target system and change the BIOS options to Hard Disk = AHCI mode
5. Change the boot options so that the target system will boot from the USB drive first and as a hard disk and Save and Exit from the BIOS setup menu
6. The target system should now reboot from the USB Flash drive to the grub4dos menu – choose menu item 2 Boot as FreeDOs Hard Disk
7. Type
checkpci m
at the FreeDos A:> command prompt – the Vendor ID and the Device ID of the AHCI controller should be listed – e.g. 8086 1C02 – make a note of these two numbers.
8. Change the BIOS back to non-AHCI (IDE/Legacy) mode and reboot to XP.
9. Now search the internet for “PCI 8086 1C02” (or whatever your PCI ID was) and locate the correct AHCI driver.
10. Download the AHCI driver files and look inside the .INF files – one of them should have the identical Vendor and Device ID – e.g.
[HardwareIds.SCSI.Napa_i386_ahci8086]
id = “PCI\VEN_8086&DEV_1C02&SUBSYS_280A103C”, “ahcix86” <<<< (example only!!!)
now search for the text that appears in the HardwareIds section name in square brackets (e.g. SCSI.Napa_i386_ahci8086 in the example), you should now search for a similar entry in the [SCSI] section of the same INF file – e.g.
[SCSI]
Napa_i386_ahci8086 = “AMD AHCI Compatible RAID Controller-x86 platform”, ahcix86 <<<< (example only!!!)
11. The text (in purple in this example) will be name of the driver displayed by Windows XP when you try to install the AHCI driver using the instructions in this tutorial (Step 14).