
Table of Contents
Upload and webcam issues (e.g. ESP32-WROVER-KIT + Camera)
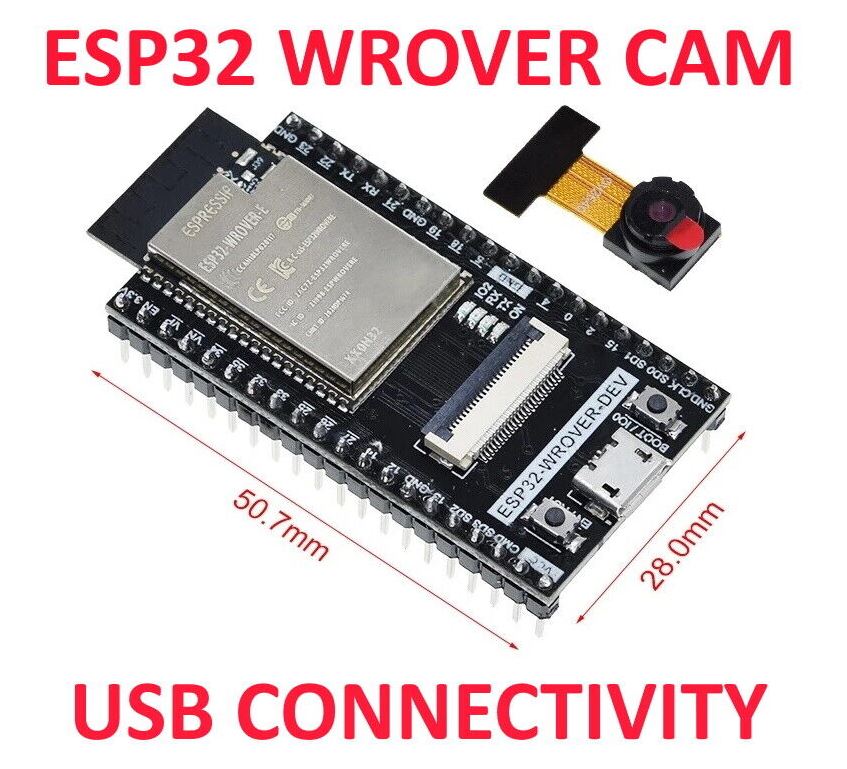
I purchased an ESP32-WROVER-DEV board from an eBay supplier which came with a small webcam.
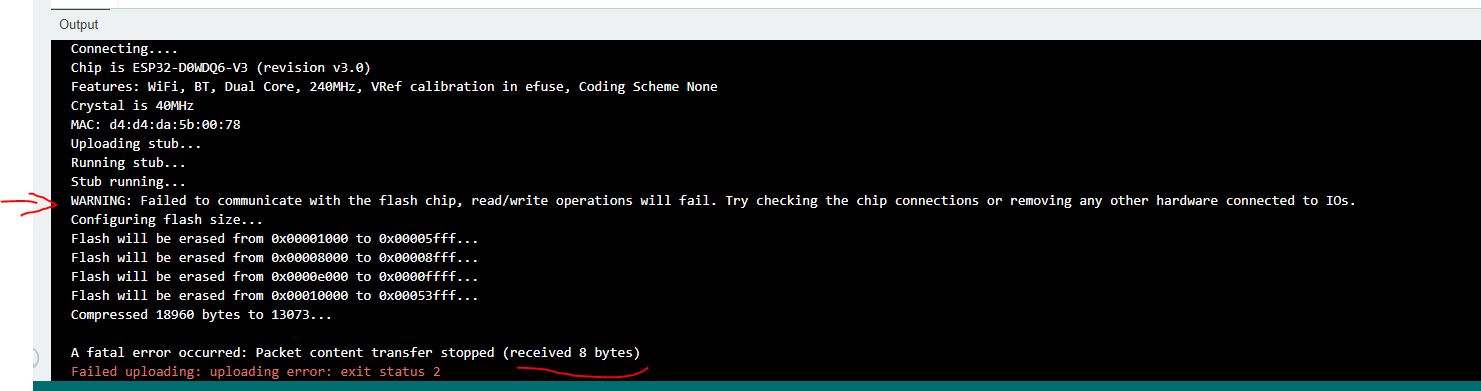
However, I had lots of problems when using this device with PlatformIO or the Arduino IDE (v2). Most of the time uploading even a small ‘Hello World’ sketch did not seem to work (even with no camera attached). The two error messages below were symptomatic of the issue:
WARNING: Failed to communicate with the flash chip, read/write operation will fail. Try checking the chip connections or removing any other hardware connected to IOs.
A fatal error occurred: Packet content transfer stopped (received 8 bytes)
Failed uploading: uploading error: exit status 2
The message always said ‘8 bytes’. Using Google did not help much. I could see that this was a very common problem, but no one seemed to have provided a solution that worked for me.
If it managed to upload, the serial output would often just repeat:
invalid header: 0xffffffff
invalid header: 0xffffffff
invalid header: 0xffffffff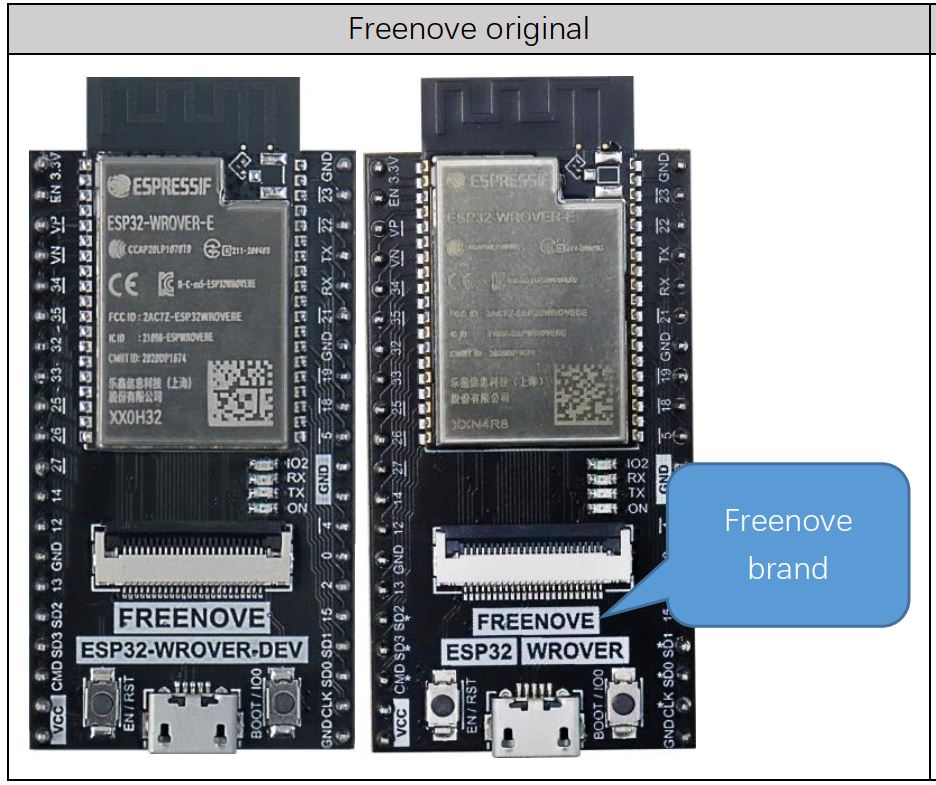
NOTE: The official FreeNove version of this board currently has a USB-C connector and has ‘FREENOVE – ESP32 WROVER‘ printed on it. This board appears to work OK and does not have these issues (QIO Flash Mode can be used and Uploads work fine).
I did notice that the first time I connected the eBay esp32 board to a new USB port on my computer, the upload would often work (but only the first time). However, the code would often not run even after a successful upload and just seemed to print some debug numbers on the serial monitor console and then reset in a continuous loop. Instead of connecting to a different port before starting an Upload, you can try just unplug the USB cable and then reconnect it to the same USB port again.
I had nothing connected to the esp32 (not even the webcam) – only the USB port was connected. If I moved the USB cable to a different port on my computer (and then changed the Port COM xx number to match) then an upload would often work the FIRST time (but the code would not run). I used both Arduino and PlatformIO. I even tried a newly installed Win11 laptop and the Arduino IDE (v2) and got exactly the same symptoms as on my PC (i.e. I needed to connect a different USB port each time I wanted to do an upload and even then the code would not run after uploading).
After two days of experimenting however, I finally managed to get the esp32 board working and I don’t get any of the problems that I had seen for many hours/days previously (until I rebooted my PC)! I can even run the camerawebserver example code quite nicely now and wave at myself in my browser! However, I could not get the ESP32-MiniWebRadio project to run (although it would upload).
N.B. Once I had the eBay esp32 board working nicely with the Arduino IDE with Uploads and the camerawebserver running nicely and repeatably on my PC, I plugged the esp32 and USB cable into my WIN11 notebook and tried to upload a simple ‘Hello World’ sketch onto it and it failed just as before! If I moved the esp32 to a different USB port on the notebook, it could upload OK, however when it ran the code I just got the ‘invalid header: 0xffffffff’ messages! I found it was necessary to change the Flash Mode to DIO, use the ESP Wrover Kit board setting and connect the USB cable to a different port on the laptop. This time the Upload worked and then it ran OK too and printed out ‘Hello World’. After that, I could load the camera webserver Sketch using full speed upload and use QIO flash mode and use the same USB port as many times as I liked – but rebooting the PC seems to reset something because QIO mode would no longer work! The FreeNove board however worked every time (QIO or DIO mode)!
TLDR
If you are experienced in esp32, etc. here is the ‘Top Level – Don’t Read’ lowdown for these (cheaper) unbranded WROOM and WROVER and CAM boards:
- In Arduino IDE – Tools – FlashMode use DIO NOT QIO – if Upload fails – disconnect and replug USB cable and try Upload again. Keep flashmode setting as DIO.
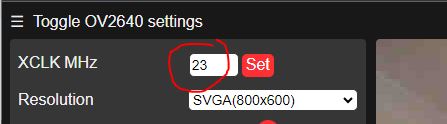
- In web browser UI – change XCLK MHz from 20 to something else (the fastest that will work – from 21 to typ. 30). 20 seems to be a BAD NUMBER!
- Buy a branded board! Avoid cheap Chinese unbranded knock-offs from eBay/AliExpress/Bangood unless you are prepared to have lots of quality issues!
Follow these steps to fix upload issues on cheap boards
Before starting, disconnect all wires and extra devices (including removing the webcam) from the esp32 board. Use a PC if possible rather than a notebook (for a better current supply) and check the 5V and 3.3V pins on the esp32 board have the correct voltages on them by using a digital volt meter. Ensure you use a good quality short USB data cable. When you connect the USB cable you should hear a normal Windows ‘ding’ sound and Device Manager should NOT show any problem (if it does you are probably using a USB charger cable rather than a USB data cable – so get a decent data cable!).
- Install the CH341 Serial driver. Use the latest version which you can find here.
- Install the Arduino IDE (v2) from here.
- Launch the Arduino IDE
- Add a new Board Manager by using File – Preferences – and add an esp32 Board Manager
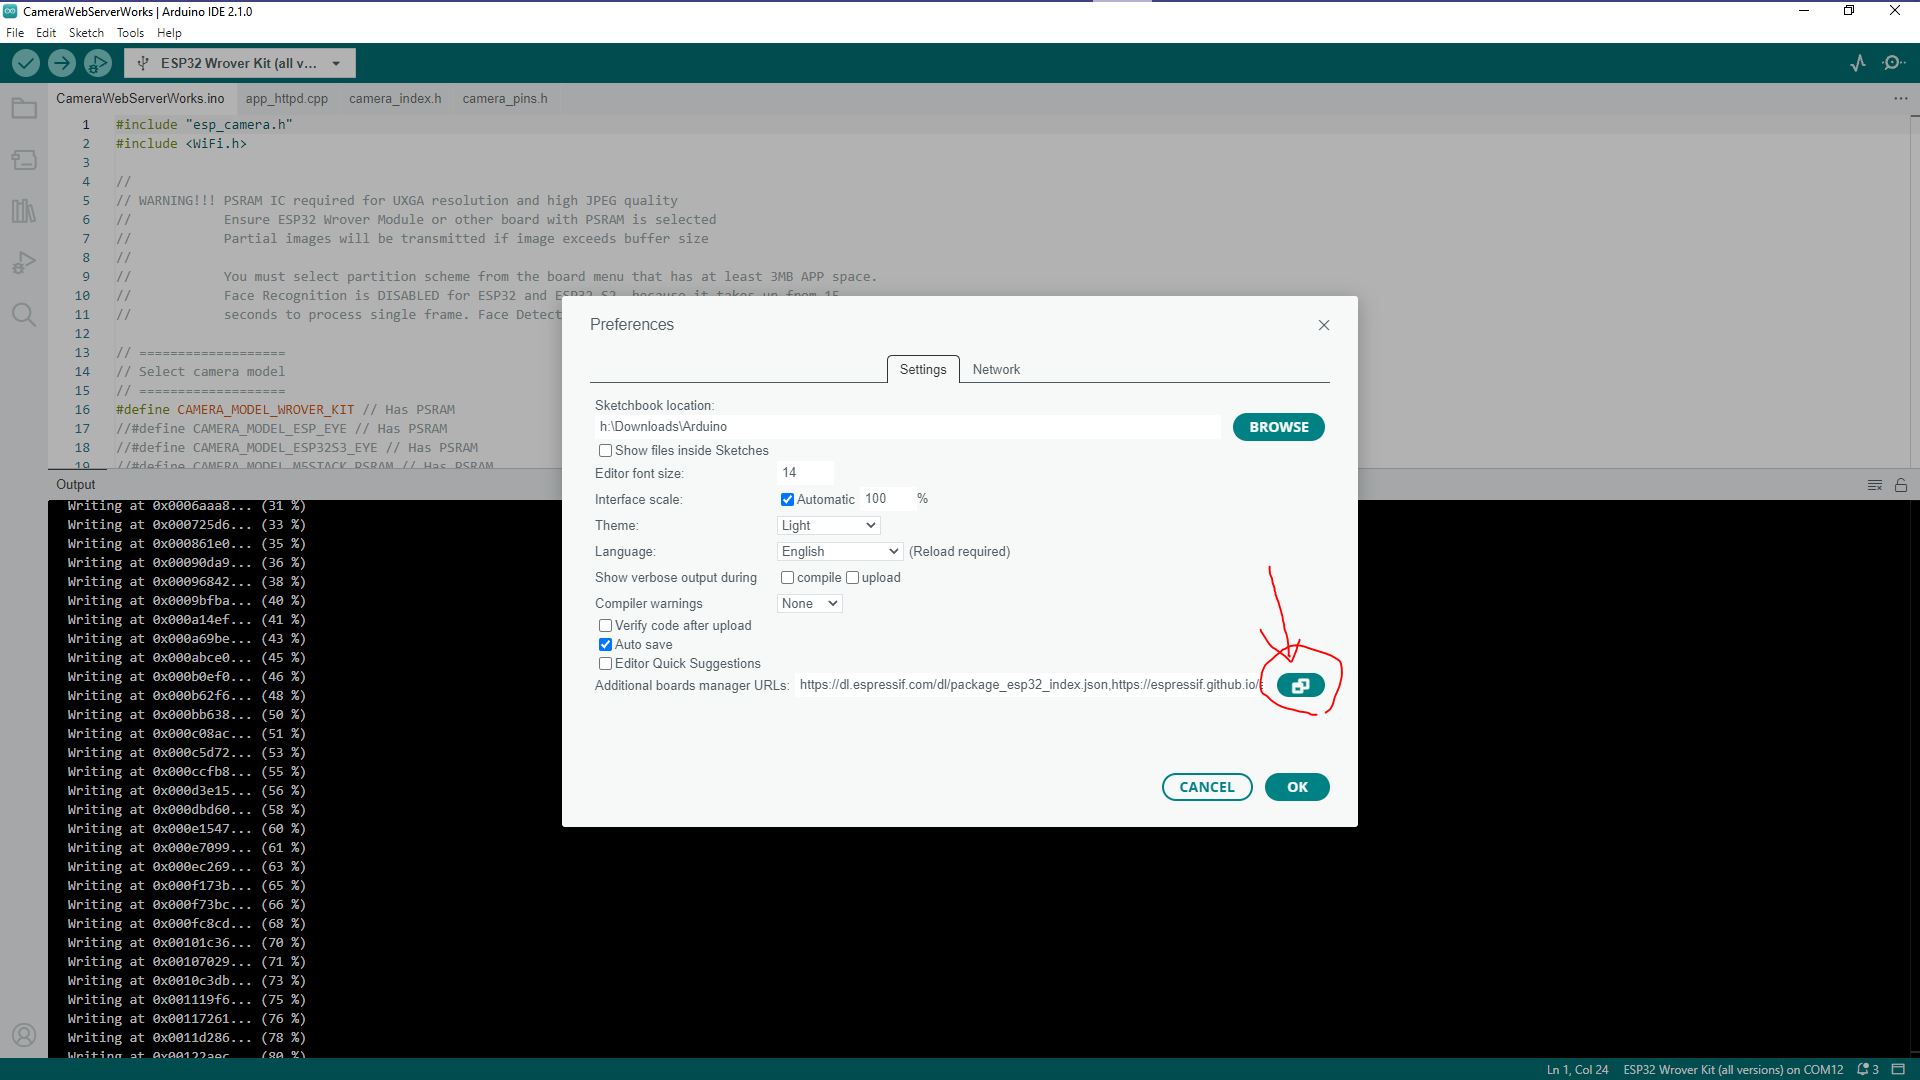
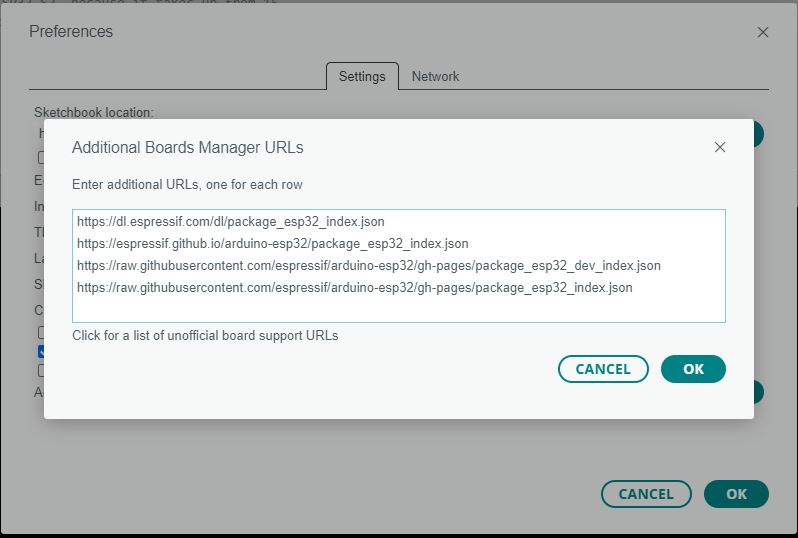
Only the last line is needed. I just added more over time.
Make sure you select the ESP32 Wrover Kit (all versions).
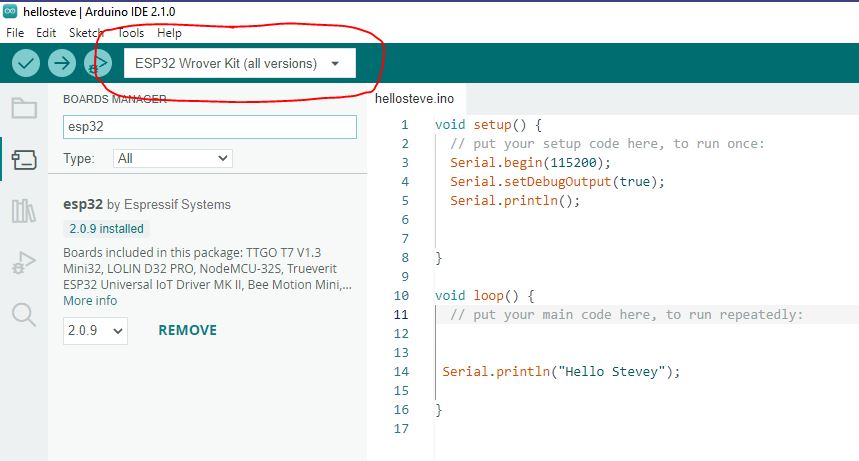
5. Create a new Sketch (Ctrl-N) – I used a simple sketch as below:
void setup() {
// put your setup code here, to run once:
Serial.begin(115200);
Serial.setDebugOutput(true);
Serial.println();
}
void loop() {
// put your main code here, to run repeatedly:
Serial.println(“Hello World”);
}
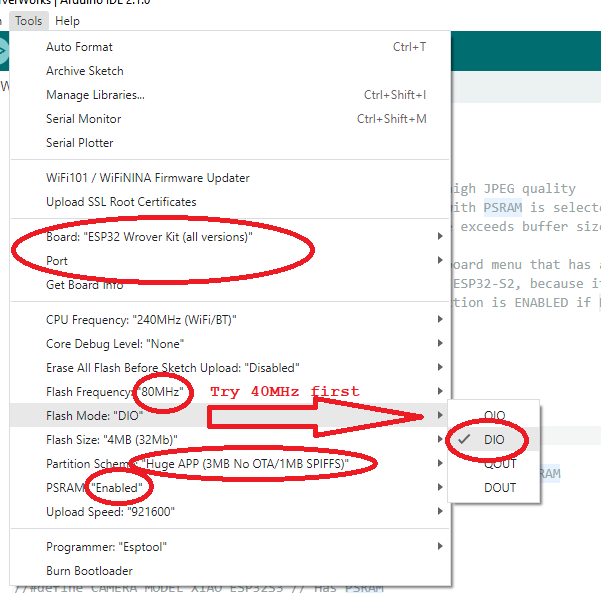
6. Now go to the Tools menu and select the settings shown below:
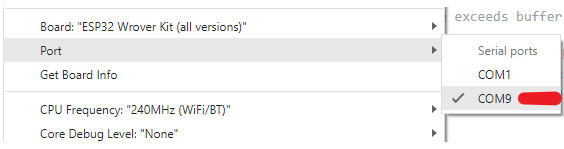
The Port must be set to the one you have connected the esp32 to – it will be listed in the Port listbox once it has been connected.
- Board = ESP32 Wrover Kit (all versions)
- Port = (as appropriate)
- CPU Freq = 240MHz
- Core Debug Level = None
- Erase all Flash Before Upload = Disabled
- Flash Frequency = 80MHz
- Flash Mode = DIO
- Flash Size = 4MB
- Partition Scheme = (any for simple Hello World sketch – try first default one or Huge App)
- PSRAM = Enabled (my WROVER had PSRAM)
- Upload Speed = 115200
- Programmer = esptool
In particular, set the Flash Mode to DIO (not QIO). You must ensure you have plugged the esp32 board into a different USB port from the one you had used before if it had failed to upload previously – and change the COM port number in the Port setting to match the new COM port number. OR just unplug the board and then re-connect it each time you Upload.
7. Now click on the Upload arrow icon to start a compile+upload process. Hopefully you will not see any error. Then click on the Serial Monitor icon (top right) and after setting the serial terminal speed to 115200 you should see your message repeated endlessly in the monitor panel. If it fails try again. If Upload fails, plug the USB cable into a different USB socket – change the COM number to the new one – and try Upload again!
8. Now repeat the Upload process several times to make sure it is reliable. You should be able to use the same USB/COM port each time. Also try different USB/COM ports too.
9. Experiment by changing the Upload speed to the maximum. You can set the Flash Mode to QIO but after a reboot you may need to change it back again to DIO – so just leave it as DIO! Changing it from QIO to DIO after a fresh boot will usually not work unless you also change to a different USB port.
I found that once it started to work, all the normal, full speed settings could be used (but only on the same PC/notebook that you did this on and only until a reboot or the PC). The key was to make sure Flash Mode was DIO.
PlatformIO
If you choose an esp Wrover Kit board option in PlatformIO, the Wrover options usually have DIO mode set by default. See here.
You can force the Flash Mode to dio (board_build.flash_mode = dio) and change the upload speed in your platformio.ini if required:
; PlatformIO Project Configuration File
;
;   Build options: build flags, source filter
;   Upload options: custom upload port, speed and extra flags
;   Library options: dependencies, extra library storages
;   Advanced options: extra scripting
;
; Please visit documentation for the other options and examples
; https://docs.platformio.org/page/projectconf.html

[env:esp-wrover-kit]
platform = espressif32
board = esp-wrover-kit
framework = arduino
board_build.flash_mode = dio
monitor_speed = 115200
upload_speed = 921600
ESP32 WROVER webcam
If you have a webcam kit, you can try the Example Sketch in the Arduino IDE via File – Examples – esp32 – Camera – CameraWebServer.
See here for more details.
Once selected and downloaded, make sure you have the ESP32 Wrover Kit (all versions) board selected and edit the model line in the ino file to match your board.
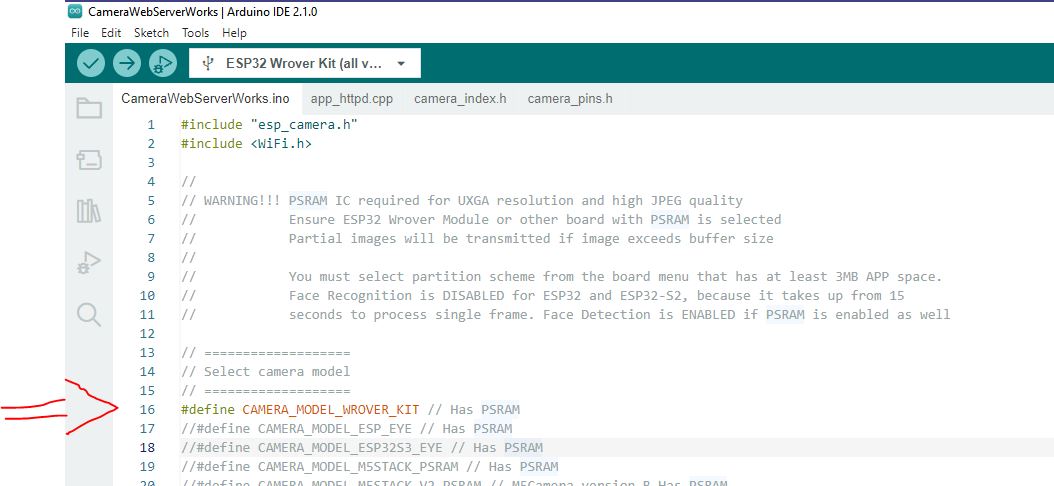
Change the Tools – Partition Scheme to ‘HUGE app‘ and enable PSRAM (my esp32 had PSRAM).
Change the SSID and password in the ino file to the values for your home router.
Press Upload and note the IP address displayed in the Serial Monitor panel. Mine was 192.168.1.108.
Now type in that IP address into the web browser of your PC (tip: use an InCognito/Privacy page to prevent any extensions from interfering with the camera html page).
Fix for poor webcam performance/frame rate
If you do not see any picture – even after clicking Start Stream, change the XCLK MHz frequency (top left of browser page) to 21 or 23 instead of 20MHz (for some reason 20MHz does not work on my board – anything from 1 to 25-30 works except 20MHz!!!). 23MHz and 800×600 seems a good compromise for the OV2640.
For some strange reason, my webcam seemed to improve in performance over about 10 minutes. At first I could only get one ‘snapshot’ which appeared very slowly. After a few minutes I started to get a few frames every ten seconds. Later, I could get pretty good streaming at 800×600 – just as it should be. the OV2640 is 1600×1200
This took me several days of experimenting and frustration to discover so I hope it helps you!
The same Sketch should also work for the higher resolution OV3660 3Mpixel (2048×1536) webcam (untested).